Thursday, August 26, 2010

Habu Textiles

This was my first visit at Habu Textiles.  Thanks to my friend Mari who took me around in NYC, I could cover five yarn stores in one day.  Thank you very much Mari.  My highlight of the day was definitely Habu.  I had prepared myself for the visit with Setsuko Torii's book weeks before: what to knit and what to get.  But the shop offers so many yarns which are completely unknown to me that I was not sure at all what to do with them.  Seeing garment samples were definitely helpful.  In the end I decided to go with my original idea of purchasing yarns for Ms. Torii's colorful cardigan.  It is knitted with cashmere yarns but I decided to go with merino yarns.  I chose six colors per instructions by Habu staff, and they assembled my kit.  Since the merino yarn was much thinner than cashmere yarn, each ball was composed of four strands: two each in two colors or four strands in single color.  One ball in dark green was done with two strand only and it is for front and neck band.  I requested for 10% extra yarns.

Habu Kit with Extra Fine Merino yarns in six colors

The above photo shows colors A through O in four strands and color a in two strands.  My colors were red, orange, chartreuse green, light brown, beige and dark green. 

Now to swatching.  Using 5.5 mm needles per instruction, I cast on 25 stitches and knittted two rows each in all the colors: A throug O.  Looks really loose, too loose, actually.  I've never done such loose knitting before and was really nerveous. 


Before felting

After felting 


After felting, though, the fabric fluffed up quite alot and you cannot see the table's surface through stitches, though it is rather loose compared to other hand knitting I've done.  I've never careated such a fabric before.  It is definitely new.  Do I like it?  I think I do.  The garment will be very light weight and soft. 

My row gauge after felting was almost at target, but my stitch gauge was a bit off.  To make sure that the garment does not turn out too large, I will be using 5 mm needles. 

Thursday, April 01, 2010

Jiutepec from Cornelia Tuttle Hamilton's "Noro Eternal"

As soon as “Noro Eternal” came out, I fell in love with Jiutepec for its design and yarns: Noro Iro and Silk Garden. In case you did not know, I just adore Noro yarns. Of course, it helps that the model is showing off the garment so stylishly. In any case, Jiutepec's knitting process caught my eyes. Ms. Hamilton's previous books also included a design with holes and I wanted to try them on a garment. Also interesting is that the garment is knitted with size 7 mm needles throughout even though Iro is very bulky and Silk Garden is worsted weight. I had yarns in my stash for more than two years before I started the project this year. Thinking back, I did not jump into this project immediately because I was unsure about the success of the garment. For one thing, I was not quite sure which cast on method I should employ for holes. Once decided that simple loop cast on will do, I felt more comfortable and started the project. I wanted my cast on edges to be soft and not bulky.

This garment is knit side-way: Starting at right front band, and proceed to right front body, back body, left front body, and left front band. I was happily knitting along until I hit left front neck shaping. It did not look the same as the right neck shaping. I think the right front neck shaping is not correct and that's what you knit at the beginning. There is no way I would undo all the way to the beginning. I wish I had checked the pattern before I casted on. When the right neck shaping is followed, I would have a very odd neck opening with back neck width of hardly 2". My neck is not that skinny. If you follow the left neck shaping, it would be about 4" which is more reasonable. Since I did not want to undo all the knitting, I compromised to use the right neck shaping. In order to produce enough back neck width, front shoulders were eased somewhat when sewn onto the back shoulders. This fudging seems to have worked.

There is one more issue to this pattern on the ribbed edges. When they tell you to repeat two rows 6 more times, one of the two repeated rows involve increasing two stitches every 5 stitches. If followed as instructed, the ribbed edging will become quite voluminous which is not what you see on the garment photos. Obviously, the referred row is not the one to repeat. I proceeded to do k4-p3 ribbing for 12 more rows.

The amount of yarns used for the smallest size were the following: 2.5 skeins of Noro Iro in Reds,2 skeins of Noro Iro in Grey/Browns, 3 skeins of Noro Silk Garden in Grey/Browns.


I love the jacket and my friends do, too. I don’t mind knitting up another one in different colors!

Thursday, March 04, 2010

Vogue 1087 and Angelina Vintage Jacket

I needed something to wear to a company party last December. I have piles of gorgeous fabrics and patterns, and I hate shopping for dresses since it takes too much time. It also takes a lot of time to sew one myself. You are saying I knit a lot. Why not sew instead of knit? Well, I can knit in the living room with my family, but I cannot sew there. I can cut pattern pieces there, but that’s just about it. Another problem is that I am completely out of practice in matching fabrics to patterns. Yes, it takes time to do this matching, at least for me. Having a lot of each does not help, either. I almost gave up in the idea of a brand new dress for the occasion. I did some fixing in preparation and have a nice wearable pullover. It might be okay for the occasion? Maybe. If only I had time to contemplate, … .

Then I remembered.  I’ve been in love with Vogue 1087 since it came out. I knew there were some issues with the pattern thanks to bloggers I ‘met’ at Sewing Pattern Review. I had two yards of beautiful burned out velvet in black/raspberry/mauve/burgundy colors. Slowly, I started the project. Some of the drawings on the instruction sheet did not make sense. No matter. It must have been an error. I’ve been knitting long enough to trust my gut feeling. Pictures and drawings can be flipped by mistake and cause confusions if the garment is not symmetric. I knew that. Well, I did okay in the end.


Now, to complete the outfit, I borrowed my daughter's cashmere cardigan for the occasion.  But I knew I could knit something really nice if I had time.  It is Angelina Vintage Jacket by Joan McGowan-Michael.  I've had the charcoal gray Peruvian Quechua from Elann.com for this project for a long time. The yarn feels really soft, light and warm due to its blend of alpaca and tencel.  Although it involves quite a lot of 2-by-2 rib which I do not like very much, it went rather fast.  I followed the pattern mostly except for smoothing out increases and decreases for sleeves and shortening sleeve edges.

Saturday, February 20, 2010

Colourscape Folk Collection

After knitting the last pullover with Rowan Colourscape, I discovered "Colourscape Folk Collection." It has at least three garments I'd love to knit: Bobbie, Drew, and Polly. Drew was just what I was looking for, although I like it to be a bit longer. I love its subtler variation of colorway Misty: not as spectacular as the VK pullover and actually quite tame, yet, eye-catching. Likewise, brown/reds/rust in Autumn colorway is nice. I've been thinking that I need to knit what I can wear to my office. You see, my boss does not approve jeans at any time and I suspect he likes us to wear business suit type clothes. I thought Drew is just the right mix of playfulness and seriousness.

Another issue for my work clothes is that it cannot be too warm. My office tends to heat up too warm and long sleeve cardigans and pullovers I've knitted are not quite useful in the office. Something like Drew or Bobbie, a cap-sleeved cardigan, are just right.

Now, Polly. I am attracted to this pullover for both colors and the design although it may not be office appropriate. I love those deep colors of Ghost colorway.

To start with I knitted Drew with some changes.


I made it wider at the bottom edge and longer with more side shaping. Instead of just stretching the garter edging, short rows were added where front neck shaping starts and at back shoulders. Instead of making two button holes, only one was made to accommodate a beautiful metal button I found. After a few wearing, I thought I could have added more side shaping, but that will be for another time, if at all.


Saturday, February 13, 2010

VK Colourscape Pullover by KF

As soon as I opened the new VK magazine, I noticed a pullover by KF. I love stripes to begin with. KF's dolman sleeve pullover has a diagonal twist to it. And, the colors! I began obsessing over the design. The only thing prevented me from jump right into the project was the dimension of the garment: bodice was too short and sleeves were too long for me. As always, I started tinkering with the design dimensions.
Based on a Rowan pullover with huge kimono sleeves I knitted a few years ago, I decided on the dimensions and did some calculation to determine stitch and row counts. I must say I was lucky this time and my numbers all worked out.

Saturday, January 09, 2010

Silk Vintage Dress


Something I made back in 2005 with Vintage Vogue 2401 pattern using red and black cross-woven silk dupioni.


With collar up.


Vintage Vogue 2401 is a reproduction from 1952.  I have serveral of Vintage Vogue, but this one was the first re-production I tried.  I love its vintage style with a modern flair.  One thing I did not expect is that there is no zipper on this dress. How do you put it on? The skirt has two sections with each section attached to front or back bodice. The sides of the back bodice extend forward and tied in front, while the sides of the front bodice have belting pieces attached with hook or eye. As a consequence, one might experience embarrassing moments when a wind blows your skirt pieces apart.


So as not to be concerned about this potential mishap, a piece of seam binding tape was attached to connect the front skirt edge and the corresponding side seam of the back skirt on the right. On the left, the same tape was attached to the left side seam of the back skirt, but snapped on to the left front skirt edge.


Front skirt with seam tapes sewn at sides.


Left side

I'd love to make another one from this pattern with one modification: add a zipper in the back to allow easier dressing, one of those inserted in the middle center back, a few inches below the collar.  As is, it is quite a struggle to put it on and off.  Of course, loosing some pounds would be a great help. 


Dava asked about the shoes I am wearing.  Here is a close up of them.  They are dark red patent leather high heels with silver buckles by Aerosol from several years back.  Perfect for the vintage dress. 

Saturday, January 02, 2010

Happy New Year!


Here is something I finished last year after a long hibernation.

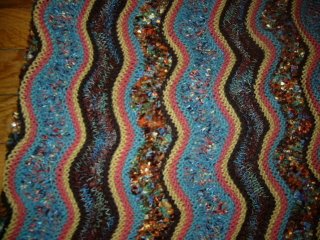
I love the colors and the wavy stitch pattern in stripes: waves, stripes and vivid colors are my weakness.

The idea came to me in early 2004 and by the summer of the same year, I had the sweater knitted up, took some photos, then … , the garment was packed away. I was meaning to save the project which turned out to be too large on me. I meant to do so for five years. Until last November, in an attempt to bring myself back to sewing, I decided that I do this fixing first. I undid almost all the seams except those on shoulders. Instead of cutting off the knitted fabric, I opted to sew with a wider seam allowances as this is a very soft and light fabric.

Love the bell-shaped sleeves.


Why didn’t I fix this thing earlier? I did not know this actually, but it was to have something lovely for the New Year!


Sheila asked about the yarn I used. They are the following in the order of knitting from the bottom hem:
1 - DS(Douceur et Soie) 19 (dark purplish red),
2 - KH(Kidsilk Haze) 600 (dewberry, mauve),
3 - Kids Seta (light blue),
4 - DS 2 (ivory),
5 - DS 20 (blue),
6 - KH 604 (light brown),
7 - KH 595 (dark red),
8 - KH 603 (white), and
9 - Kids Seta (chocolate brown).
Yarns were doubled through out.

Wednesday, December 02, 2009

Big Slouchy Hat


I always had problems with hats. They look funny on my head while my DDs could look perfectly fine with the same hats. I don't recall ever having one that made me smile. Like my aunt said when I was 10 or 11 year old. She thought I was wearing my hat 'wrong' and kindly tried to fix it. She fiddled this way and that for a while, but in the end she gave up and mumbled something like my head is not a hat head. So, I knew this fact for almost all my life.

Then, one day I met one that did not look funny. It was a knitted hat, bulky single ply yarn in acrylic 100%. It was on sale for about $12. I said to myself, I'd better buy this one and knock it off!

So far, I made four, two of which went to my DD2. I am still working out the secret of this hat. Why it looks fine but not the others?

Friday, May 01, 2009

Harrisville Designs


During the school vacation week, my family visited Harrisville, New Hampshire. I am smiling because I purchased beautiful yarns, three-bag-full, together with some books.

Thursday, April 09, 2009

Orange XOXO Cardigan

DD2's been looking for a long and roomy cardigan for a while. We could not find one in children's, teens’, or women's clothing stores around here or on internet. She has a relatively clear idea on how it ought to look and feel, and that makes it impossible to find the exact one. So, I decided that she needs my help.

We started with yarn selection: not scratchy wool, not a bulky yarn, soft and delicate, and in orange, her favorite color. We ended up with acrylic/wool blend in bright orange from Bergere de France. I purchased a pattern CD and ordered the yarn for her last fall.

Next, pattern. Not quite willing to design the whole cardigan from scratch, I looked for girls' cardigan/pullover patterns. Even if DD2 was not quite sure about the photos I've shown her, I decided to order a Phildar Enfants issue. There are two designs I thought might work for her ideas. Design 14 with lots of 1-by-1 ribs but roomy lower bodice and Design 4 with some interesting cables. Main issue is that I like to knit interesting patterns while DD2 does not like ‘fancy’ clothes for a special occasion. She wants everyday sort of clothes. Basically, she likes a lot of stockinet stitches. This is bad news for me. In order to make miles of stockinet stitches less boring, I added a variegated lace weight alpaca yarn from my LYS. It is called J. Knits Lace-A-Licious in pink color, Providence. It added a nice hand and color interest to the fabric without itchiness.


With DD2's desire in mind, I combined the two designs from the magazine: roomy lower bodice and fitted upper bodice of Design 14, XOXO cable pattern of Design 4, and ample sleeves but not too baggy. Even though DD2 resisted the idea of adding cables, she loved XOXO pattern. So, I happily knitted the orange XOXO cardigan.


She loves the result! Thanks goodness!!

Saturday, April 04, 2009

Puppy Yarn’s Braid Scarf

I saw this cute scarf made by a Japanese knitter, Ishi-san, who does such great jobs at anything she creates. I learned the pattern is from Puppy, a Japanese yarn company, and was made available free in 2003 to customers purchased their yarns. In other words, I don’t have the pattern.

Here is what I thought it might be done. It is okay, but something is not quite right. I used 5 mm crochet hook and Crystal Palace yarn Taos.


Later on, Yuri-san, a knitting friend in Japan, offered to send me yarns and the pattern. So, we exchanged knitting goods across the Pacific. She loves Norah Gaughan’s designs but Berroco booklets are not available in Japan and that’s what I sent to her. I now have the yarn and the pattern to crochet the braid scarf!

With the pattern and the same yarn used by Ishi-san, I tried the other day at Knitsmith. Initially, I was not quite happy with the results, but after playing with the location and the method of anchoring the chains at the bottom of the last double crochet, I think I got it. Now, all I have to do is to finish the project before next winter.

Saturday, March 21, 2009

Green Cabled Yoke Pullover

This one was one of those designs you fall in love at first sight: fabulous folds created by cabling, and yet, very simple in construction. It involves rectangle pieces for the body and yoke, and trapezoid sleeves. Looks more than that on the photo. I thought the yarn ought to be soft but not flimsy to show off the beautiful folds of the yoke. I knew I did not have such a perfect yarn in my stash and I was looking for one. At my LYS, I saw a swatch of a very fluffy looking yarn, CEY Lush. It was just perfect for the project I thought. It is a lover yarn with 50% angora and 50% wool.

Cables yoke has two rectangles, one narrower and longer than the other to be placed right above the bodice and the wider and shorter one to go on top of the narrower one. The original garment has a turtle neck above the yoke. It looks fine on the model, but I thought I would not like it with angora/wool yarn. It will choke me. After finishing the cabled pieces, I went ahead and completed the yoke to try on. The yoke looked a bit different depending on where you place the shoulder points along the cabled strip. I liked it when the crossing hit the shoulder points. For the neck edge, I picked up about 25% more stitches than the pattern, knit one round, purl one round, and cast off purl-wise very loosely.

For the body, I wanted the front edge to dip a bit more than the back and started by picking up stitches from the back yoke only, leaving front yoke and sleeve sections. Also, when I tried on the yoke, it felt too small to go around my body and arms comfortably. So, I decided to add underarm stitches as I knitted the back body. I could have made more difference in the front and back bodice lengths but that will be for the next version, if at all. It looks okay as it is for now. Now, the sleeves, or no sleeves? My knitting friends at Knitsmith were all saying I should just do without sleeves. I agree that it is very elegant that way. However, it is less likely to be worn without sleeves than with them, and I decided to knit sleeves after all.

Tuesday, March 10, 2009

Yellow Tweedy Cardigan

I started to knit this cardigan on January 1, 2009. It is knitted with about 7.2 skeins of Peace Fleece in Khrushchev Corn Yellow. I love this shade of yellow.


I bought this yarn a few years back, way before Ravelry, when I visited yarn stores in Maine and New Hampshire with my knitting friends. Ordinarily, I would not consider yellow for myself, but this one was different. I am not a color theory expert and I have no idea what makes this yellow so different from the other ones. I fell in love and bought some skeins without having a particular project in mind.

Then, came Ravelry. After becoming a huge fan of Norah Gaughan, I would look for her designs and marvel them on Ravelry. Then I happened to see Norah's Tweedy Aran Cardigan from Interweave Knit magazine 2001/2002 issue in many different yarns and colors. Some of the finished projects were actually knitted with Peace Fleece. Then, I knew that I had to knit it with my yellow Peace Fleece. Given such a useful tool as Ravelry, I started to study the finished garments. I noticed that I liked versions which looked much longer than the others. I thought the longer versions show off waist shaping better. I also looked at button choices made by fellow knitters. Truly, Ravelry adds such an interesting dimension to knitting.

Now, about Norah's pattern. I love her fancy rib stitches: very stretchy and highly textured rib stitches. I almost thought of using them for entire sleeves but I decided that it might be too much for my poor wrists as this yellow Peace Fleece was quite hard on my hands in twisted stitches and cables. The photo below shows the texture of the fancy rib stitches best.


To make my life easier in executing fancy rib stitches, I took an extra step and rearranged stitches for easier knitting: Slip the first stitch to the right needle purl-wise and slip the second stitch knit-wise. Place these two stitches back to the left needle. Notice that the right leg of the second stitch is now easier to access from the back. Proceed by knitting into the second stitch’s right leg, and, without removing stitches from the left needle, knit the first stitch’s right leg. Remove both stitches from the left needle. Note to self: Fancy rib stitches eat up a lot of yarn. Estimate more yarn if I ever knit the same cardigan and use the stitch on sleeves.

Here are the changes I made: Lengthen the bodice by about 2" and to add more waist shaping (instead of 5 times, I did 7 times). Instead of making button holes involving just one yo, I chose to use a similar method I employed for Winter Wonderland Coat and did one-row button holes over three stitches. The modification was made to strengthen the right edge of the holes. Cast off the first stitch by slipping it over the last stitch on the right needle (it looks like k2tog). The next two stitches are cast off without using the working yarn by simply slip the stitch over the next stitch twice. Turn the work around and cast on four stitches using cable cast on method. Turn the work around and knit (or purl) the first stitch on the left needle with the last cast on stitch on the right needle. For this last step, the last cast on stitch must be transferred to the left needle first.

I found nice black horn buttons with notches etched on the surface, mimicking the fancy rib stitch pattern. Overall, this was a quite satisfying project.


I noticed that it goes very well with my Noro Sock Scarf recently finished.

Sunday, March 08, 2009

Crochet Noro Sock Scarf

I saw this beautifully crochet scarf in this blog sometime ago. The stitches are very interesting and beautifully executed. And the colors of the yarns ... . Absolutely gorgeous! Unfortunately, they are not available in the US as far as I know, and this is one of those cases where yarns mattered a lot. So, I just admired the work and never thought of making one myself. Then, I saw another scarf on Ravelry where Noro's sock yarns were used for the same pattern with gorgeous result. Here is her blog post on it. I happened to have one skein of Noro Kureyon Sock yarn in color 95, my favorite in Noro Kureyon colors.


This ball of sock yarn, I originally entertained the idea of knitting a skirt with it: the idea that its nylon content prevents bagging around the hip. I did not like the fabric as much and the yarn ball was just sitting at the bottom of WIP pile. At any rate, I jumped on the idea of the crochet scarf. I used the diagram from here and modified a little to make the fabric flatter: where there is one single crochet symbol, I added two more in the middle section and one more at the edge. I did five wheels per row. The wheels were crocheted using yarns alternately pulled from inside and outside of the same ball. It was quite a mess to pull yarn from the center as it had a tendency to twist, kink and knot. I ended up purchasing another ball to complete the project and it would have been much easier to use two balls alternately from the start. For the edging, I did a single row of single crochet. It is absolutely lovely!

Although it was not easy to crochet this scarf, I love the result so much and I am already working on the second one using two colors #95 and #188, just like Anne did.

Monday, February 02, 2009

On Winter Wonderland coat

When the coat was finished, I brought it to my knitting group. On that particular day, one of the fellow knitters, Valerie, was there with one of her daughters. She was quietly knitting cute little Totoros with very colorful yarns and buttons. One week later, I was given the best compliment I could ever imagine. Valerie's daughter asked her if I really knitted the coat when they got home. Hearing that it was indeed what I knitted, she told her mother that she wanted to become as good at doing something as I knit, and later she decided that reading is what she wants to be very good at. I am so glad Valerie told me this story and truly stunned to learn that my knitting could do some good as it did to her daughter.

So, in the pursuit of the craft, here are some updates on the coat. The front bands are behaving better after application of Petersham ribbons, but they are still somewhat uneven. I now realize that this is due to stitches being pulled in by cable patterns. I could have applied wider petershams. I might try that next winter.


I failed to mention on the earlier post, but I do a little trick when I knit one-row button holes: I cast on one additional stitch which will then be knitted with the next stitch. I do this to prevent weak and stretched inner edge on the holes. Despite the trick, I found my buttonholes not quite sturdy at the outer edge. So, I decided to reinforce the buttonholes: using the same yarn, I applied buttonhole stitches all around. Another thing I forgot to mention: I use back buttons for support.

Thursday, January 01, 2009

Winter Wonderland Coat

Happy New Year from snow covered Boston!

Watching snow falling quietly, I was sewing up Winter Wonderland Coat yesterday, the very last project of 2008.


It turned out relatively light as it required about 3.5 skeins of Cascade Ecological Wool and the gauge was right on target with the specified needle size. Initially, I was not that sure of the yarn choice and I began knitting sleeves first. It turned out to be a good decision as I had to rip all the way to the beginning once. My tension was too loose and I was making mistakes all over the place. Overall, knitting was fun. I realized how I love cable and lace patterns. I also love the front dip and collar shaping. One thing I am not happy about is the flimsiness of the front bands. I am planning to attach petershams which I placed an order from The Sewing Place. Hopefully, it will do the trick.

Thursday, December 25, 2008

Red Dress

For my DD2, I knitted a dress in 2002. She was 5 years old. The pattern is Child’s Sand Dollar by Jade Starmore with some modifications, and I knitted with Baby Ull by Dale of Norway. She wore it every winter all these years since then until this winter. She pulled it out of her winter clothes and said that sleeves were too tight at the cuffs. After all, she’s been growing and sleeves were too short and cuffs were landing on her mid arms. What did I do? Undid the cuffs and knitted the sleeves longer. She wanted them to be very long. So, here she is with her ‘new’ tunic.


The photo below shows the difference in sleeve lengths.