Showing posts with label VK. Show all posts

Monday, February 16, 2015

Bright Colors

As soon as I saw Fall issue of Vogue Knitting magazine last year, my mind was set to knit Ms. Wallin’s brightly colored pullover.  Yes, yet another project with the design by Ms. Marie Wallin!  


I was knitting Avril Silk Tsumugi tunic at that time.  Since I decided some years ago that I was not going to have two major projects at the same time any longer, I decided to wait until I have time to tackle the pullover.  I was tempted to start such a beautifully colored pullover, but I persevered.  Though I began planning the project immediately.  It was obvious to me to knit it in round.  Also, to add some waist shaping to it.  Other than that, I followed the pattern when I began knitting it in January.

Here are some close-up of the gorgeous colors and stitches.  Notice something?  The Fair Isle pattern in this pullover involves both knit and purl stitches in about 80 percent of rows.  It reminds me of Bohus knits.  I just love those purl bump mingling of colors adding extra dimension to the fabric.


I must add that the yarns are fabulous, Rowan Kid Classic and Rowan Alpaca Colour. I used the specified colors, but there are a few versions knitted using different colors on on Ravelry and they are gorgeous as well.  This was the first time I used Rowan Alpaca Colour and I find it very soft and warm.  I was glad that the sleeves were not in Fair Isle pattern.  I have been wearing the pullover with such joy.  Perfect for this long snowy winter.


So, what's next?  Well, I will be honest, another design by Ms. Marie Wallin!  

Saturday, November 30, 2013

Lace Coat, Finished!

I undid all the edgings and re-worked them. 


It looks much better than before, don't you agree?

I made button holes in simple Tunisian fabric, by skipping a vertical bar going forward, and adding a chain on the way back.   I placed the button holes so that buttons are next to Tunisian stripes, not the broomstick lace stripes. 


I am so relieved that all my efforts did  not go to waste.


Sunday, November 24, 2013

Lace Coat from Vogue Crochet 2012

I have been working on design #37 Lace Coat by Lisa Daehlin from Vogue Knitting Crochet 2012 magazine. I finished the coat for now but I am not satisfied with the results. I will be working on it further, probably sometime later after figuring out what I need to do.


I used beautiful Lang Jawoll Magic yarn in 84-18, black and dark green mix. The yarn is very loosely plied, almost single to my eye.; I used 5.5 mm crochet hook and 25mm knitting circular needles mostly, but used a smaller hook for picking up loops.

What I like about the coat is the very lacy main fabric.  What I do not like is the front bands.  The neck and the bottom edgings are okay as they are, although I would like to have a bit firmer feel along the neck.  In order to re-do front bands, I will need to remove the neck band and the last row of the bottom band since they were applied after front bands were completed.  Bummer!   I am going to leave the coat on the dress form for now. 

Sunday, November 03, 2013

Broomstick and Tunisian Lace

Light weight and lacy fabric in dark green and black.
Love it! 

There are forums on Ravelry where this lace coat project is discussed.  They are so helpful.  I highly recommend reading them all before starting the project.  I was buffled with the instructions on sleeves initially.  With some logical thinking and reading posts by trailblazing Ravelrers I am feeling confident in finishing this project.

Monday, October 21, 2013

Tunisian Crochet Lace Tunic

It is finally finished and I just love it.  Jojoland Melody is a light and beautiful yarn, and turned out to be just perfect for this tunic.  What a luck!  Can you tell how happy I am with the tunic?  I like the length of the bodice as well as the sleeves. 


 I deviated from the pattern and did the following:
Sleeves: Cast on 78 stitches (must be a multiple of 3) for 16 ½” long sleeves. Sleeves were knit sideway. The Tss and Tps edge was about 1” long. To knit 15” wide sleeves, 28 rows in pattern stitches were needed. On the 28th row, do Tss on return, and follow with 3 rows of Tps for the edging.  I left the remaining yarn on each sleeve, to be used later in assembly.  I used one ball per sleeve.
Front and Back Bodice: Cast on 117 stitches and knit 40 rows in pattern (19 ½”), reducing to 99 stitches over the 40 rows (reduce 3 stitches at each end every 10 rows starting at row 11, three times total, 18 stitches decreased). Place a marker at each side at 40th row for the sleeve placement. Knit 16 more rows (7 ½”). On the last row, do Tss on return followed by three rows of Tps for the edging.
Assembly: Seam bodice together with right sides together from the bottom edge to the marker. Seam bodice and sleeves together with right sides together, making sure the attached yarn of the sleeves will be at the cuff end. With the attached yarn on the sleeves, knit top edge finishing as instructed. With the same yarn, knit the sleeve cuff edging. Instead of buttons, I used chain stitches in zigzag pattern to close the top of the sleeves and shoulders.  I borrowed this method from Madonna pullover I knit this summer. 


More photos of close up and the on-the-table flat photos.


This was my first successful crochet project.  I think I will do more crochet in the future.


Sunday, June 30, 2013

Tunisian Crochet Project

I have been working on a lovely tunic from last year's Vogue Crochet magazine, #32 . This project is one of several Tunisian crochet projects in the magazine I liked and especially I like #37 besides #32. By the way, this is my first time taking up Tunisian crochet. So, how have I been doing?  Well, so far so good, although with a lot of trial and error. For example, I am currently working on my third sleeve and I will need to make a fourth one: i.e. my first two were not good at all.

First of all, the yarn used.  I have had seven balls of Jojoland Melody, a light fingering weight yarn, in navy blue/burgundy mix for several years.  I thought they were perfect for the tunic. The original design was crocheted with Koigu KPPPM using 5 mm hook.  Melody is thinner and less meaty than Koigu and I decided to start with 4 mm hook.

Before taking a plunge, I did some practice with 4 mm hook and obtained the gauge of 21 stitches and 10 rows for 4” by 4” square. I thought I was ready.  Since I was not certain about the yarn amount, I did some crude calculation and concluded that I had to be able to complete one sleeve with a ball of Melody.

As usual, I started with a sleeve when not certain about the gauge or the design. With my gauge, 16.5” meant 87 stitches. I think the pattern instruction has the cast on numbers for sleeves wrong. It should be 78 stitches with the gauge and the intended length. When I was almost done with the first ball of yarn, I had still some inches to complete one sleeve. Not good at all! I had to make the garment smaller (not a good idea), or go up on the hook size to make the fabric less dense. I took the latter option and restarted with 5 mm hook.  Assuming I was not too far off from the gauge in the instructions, I started with 78 stitches. 


When I completed the second sleeve I noticed that the fabric was too stretchy at the lower half than the upper half (see the photo above).  Also, I noticed a severe biasing of the fabric towards right. Apparently, this biasing is typical for Tunisian crochet. I was not happy with the completed sleeve at all. Looks like I was still learning how to maintain the tension with the first half of the sleeve. What do I do? I contemplated for a few days and decided to start again. I hate to regret too late. So, here I am, working on the first good sleeve. I am crossing my fingers!


Monday, May 06, 2013

Happy and Older Creation

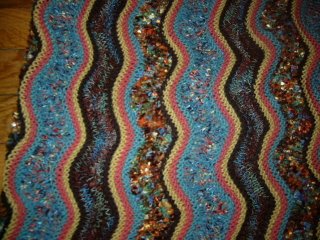
The last and probably the only occasion where I was really creative was when I knitted the cut-away boucle jacket in 2005.  I had this beautiful Noro Shinano yarn in mixed green and ivory which I bought on sale with no dedicated project in mind.  I just loved the color and feel of the yarn which is wool/silk blend. 

I swatched with different patterns but I was not happy at all even after using up entire ball.  Then I realized that it needed some more colors, fuzzy colors.  So, I bought several worsted weight mohair yarns in orange red, greens, and blues, some of them were heathered colors.  One of them was a mohair loop yarn.  Instead of striping mohair yarns with Shinano, I made a magic ball: a ball of yarn made by cutting and knotting lengths of yarns.  I think I cut the mohair yarns in about 15” long pieces.  I did not measure them.  Just cut them approximately.  Then tie them into a ball of yarn by selecting different yarns randomly. 
I began swatching with the following stitch pattern:
With Noro Shinano cast on, and knit two rows (garter stitch).  Third and forth rows are knit with magic ball *knit 1, slip 1 as if the purl with yarn in back *, repeat * to * on row 3.  On row 4 slip all the previously slipped stitch with yarn in front as if to purl and knit all the knitted stitches.  Rows 5 and 6, garter stitch with Noro Shinano.  Rows 7 and 8 are similar to rows 3 and 4 except slipped and knit stitches are reversed so that the mohair yarns show in staggered pattern rather than lined up. 


Initially, making the magic ball made me feel so wrong: Cut up yarns and then tie them up every 15”!  But, when I saw the swatch, my feeling of guilt went away. 
The pattern I selected was design #1 from VK magazine Winter 2004/2005 issue, without the back pleat.  I reversed the right and wrong side of knitting along the lapel line in the front bodices.  To finish it up, I added a braided trim along the edges and cuffs.  I used the orange red mohair yarns and a bright red angora yarn I had in my stash for the braid.  After a few wearing, I noticed that the jacket was losing its shape and thought it needed a lining.  I bought beautiful lightweight polyester fabric in hand-paint like print in greens and blues, lined the whole jacket except for the lapels and the collar, and hand quilted throughout.  The lining pattern was made up by simply placing the jacket on a blank sheet of paper and traced it.  I had to make certain that the pattern is symmetric.  That was all what I did. 


This was such an organic project and I love the result. 
The only problem is that it is an orphan at this point.  I had a dark green knitted short skirt, but I have grown a bit since then.  All I could come up with in my wardrobe was the tweed skirt.  It is not too bad together, but not good enough.  So, I should dig up my stash in search of dark green fabric!

Saturday, February 13, 2010

VK Colourscape Pullover by KF

As soon as I opened the new VK magazine, I noticed a pullover by KF. I love stripes to begin with. KF's dolman sleeve pullover has a diagonal twist to it. And, the colors! I began obsessing over the design. The only thing prevented me from jump right into the project was the dimension of the garment: bodice was too short and sleeves were too long for me. As always, I started tinkering with the design dimensions.
Based on a Rowan pullover with huge kimono sleeves I knitted a few years ago, I decided on the dimensions and did some calculation to determine stitch and row counts. I must say I was lucky this time and my numbers all worked out.

Wednesday, January 02, 2008

Hat Crazy

Happy New Year to you all!

I've been knitting hats since my last major project was completed. Two scrappy hats were the first ones, followed by herringbone cloche/hat, cabled hats, and just completed berets. I have not established a habit of blogging regularly and just kept on knitting. So, this post will be rather long, I am afraid.


The herringbone cloche in Vogue Knitting Caps and Hats Two is something I wanted to knit for a few years. Its shape and stitch pattern appealed to me. It uses this neat stitch which is also used in My So-called Scarf and I knitted it last January. I thought it would be nice to have a matching hat. The only issue was that the pattern is written for size 20" only while my head is 23" plus. Besides, I hate snug hats. Also, the original pattern calls for Koigu Kersti in DK weight while I wanted to use Manos del Uruguay which is heavy worsted weight.

I started a test version with leftover Classic Elite Beatrice which happens to be heavy worsted weight. I followed the pattern with some gauge adjustments using 5.5 mm needles and aimed for 24" circumference. I did three sections for the crown as directed. Seaming these sections required thinking however. In the photo of the book, you see a vertical line along the seam which definitely does not belong to the herringbone pattern. As you can see below, in my cloche, it is less visible. It was achieved by just picking up the vertexes.


The Beatrice yarn was so bouncy and I loved the firmness of the finished hat. I wore it just about everyday, until I lost it on a cab. How stupid could I be? I just left it on the seat. I was so sad and was lamenting about it for a few days, wondering how I could recover from the loss. Well, I just bought more of the same yarn in different colors.

In the meantime, I’ve knitted another herringbone hat with Manos. This time, I knitted the crown as one flat piece. I love this version much better than the first. So, when Beatrice yarns arrive, I will be knitting the second version.


By the way, I found out that I don’t like the matching hat and scarf set, at least not with multi colored Manos.


Next hats are designed by a fellow Knitsmith, Thea. The pattern is available for free here.


When I saw her first baby version, I fell in love with the style. In a short while, she did adult versions, Woven and Cabled! I thought the patterns could work for my head and face shape which require a brim. I made it a bit larger than Thea’s original pattern and it really turned out nice, so nice that my DD1 decided it has to be hers. To be honest, she looks better in it than I. Big sister’s new hat leads to her little sister’s new hat usually. So, here they are in new hats. BTW, I used gold Roman coin buttons from my button collection.


The last project of 2007 was Rowan free pattern, Gemma Beret, for DDs. Have you felt Brushed Suri from Blue Sky Alpaca? If you have not, go to your LYS and touch it. It is heavenly, just as soft as clouds look in autumn sky. It looks like a regular mohair yarn which might feel scratchy to some people. The look is really deceiving. This is probably the softest yarn I’ve ever felt. I needed less than one skein for the beret which was knitted with the specified needles but with fewer numbers of stitches cast on. My DDs are very pleased with it.


Wednesday, March 14, 2007

VK Capecho


This is not for myself, but for my DDs.


I used Elann's Esprit in Natural with 4 mm needles and knitted size S. I followed the pattern as written through Pentagon 11. For sleeves, I cast on 15 stitches to prevent extra material at underarm. Also, only one side of Pentagons 8 and 9 contribute to the bottom hem, rather than 2 sides. The sides adjacent to the sleeve pentagons were brought to the back and stitched onto the back hem, resulting in considerably smaller hem circumference. My daughters are 9 and 11 years old. I think they look rather cute in it.

For more views go here.