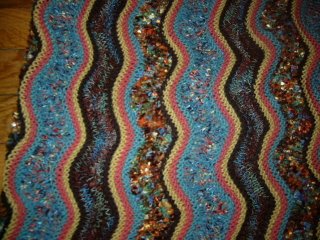
I dislike top-down sleeves knitted off of bodice. This is so because I cannot make a neat and tidy pickup row. My stitches are so wonky and unpleasant-looking when I tried. So, I went ahead and attempted to convert top-down instructions into flat instructions. That was when I began wondering.
The top-down instructions would have you pick up X stitches around the armhole, work short rows starting symmetrically around the shoulder point, and arrive at the underarm with the same number of stitches, X, for the underarm circumference. This seems odd to me unless the armhole size and underarm circumference are the same. Should not we pick up more stitches along the armhole and reduce the stitch count while knitting sleeve head with short rows?
Since I dislike top-down sleeves, I have not paid close attention to this matter in the past. Has anyone seen a top-down sleeve head instruction involving decreasing stitch count?
I knitted my sleeves flat and set them in. They looked okay on a flat surface, but the sleeves had tendency to swing backward on my dress form. Upon inspection, I found out the reason: sleeves were set-in a lot forward than they ought to be, hence swinging backward at sleeve hems. Why did this happen?
My arm holes are made up with four sections: two vertical straight sides, one on stitch holder and another on a white chain cable, and horizontal curved top and bottom. The pattern instructions have you work short-rows around the center of the horizontal curved section, indicating that the shoulder point ought to be there. On my dress form, however, the center of the true sleeve head needs to be located at the top of the vertical armhole section on the back as you can see in the second photo on my previous post.
So, my sleeves were set-in about two inches too forward and lower than the shoulder point on the dress form. No wonder! I must have been blind and failed to think more critically. Had I inspected the bodice carefully without sleeves on the dress form first, I could have noticed the potential problem. Shame.
So, I had to remove the sleeves, and re-set them properly. At least, I did not need to re-knit the entire sleeves. Here are the final result.
I love the lightness and warmth of the coat, or the cardigan, not to mention the color! The ribbed cable is really nice looking on both inside and outside.
Monday, March 31, 2014
Saturday, March 29, 2014
Garter Stitch Triangle on Mirrored-Cable Swing Coat
While I was still working on Harris from Rowan Magazine #52 last year, I began tinkering on Mirrored-Cable Swing Coat pattern as I needed a simpler project to knit besides Harris. I purchased a gorgeous dark green shade of Louisa Harding Millais yarns last summer and I wanted to use them for the coat. As I mentioned before, the difference in gauge was too much between the pattern instruction and Millais, and modifications were rather involved.
At that time, besides the gauge difference to accommodate, I was also interested in reducing the bulkiness of the coat in case using less bulky Millais may not be enough. In the end, I did not use any of the additional ideas to reduce the hem circumference. However, I started knitting from the center back towards fronts and changed one feature.
In the original version as shown below, there seems to be a gap at the center of the garter triangle.
I decided to eliminate it.
I noticed that this triangle is not just a pleasant design on the back, but it did reduce the hem circumference quite a lot, a very clever design component. I am so glad that I did not do excessive tinkering on the design.
Bronwen
I love Bronwen by Ms. Marie Wallin.
The original version is knitted up with a gorgeous yellow green called Hubberholme, as well as lighter burgundy, yellow, and brown edging. Although I love these colors, I thought I need something to go with my navy blue work clothes and changed colors. I am quite happy with my color choices: Askrigg, Wensley, Burnsall, and Gunnerside.
A friend of mine said the cardigan reminded her of a Chanel jacket. Now, that is a compliment. Then, another friend said that this is the best garment I've ever knitted. Oh, my!
In stead of requiring two balls each of the four colors, I needed a third ball of the three colors used in stripes. I think it is because I knit relatively loosely and I may have knitted sleeves longer than instructed. At any rate, with such compliments, I cannot complain about this garment.
I am wearing Christine Jonson Pencil Skirt with Bronwen in the photo above. The skirt was made with a black wool jersey, and I added a two-inch wide elastic to the waist band since my wool fabric does not have the required
The original version is knitted up with a gorgeous yellow green called Hubberholme, as well as lighter burgundy, yellow, and brown edging. Although I love these colors, I thought I need something to go with my navy blue work clothes and changed colors. I am quite happy with my color choices: Askrigg, Wensley, Burnsall, and Gunnerside.
A friend of mine said the cardigan reminded her of a Chanel jacket. Now, that is a compliment. Then, another friend said that this is the best garment I've ever knitted. Oh, my!
In stead of requiring two balls each of the four colors, I needed a third ball of the three colors used in stripes. I think it is because I knit relatively loosely and I may have knitted sleeves longer than instructed. At any rate, with such compliments, I cannot complain about this garment.
I am wearing Christine Jonson Pencil Skirt with Bronwen in the photo above. The skirt was made with a black wool jersey, and I added a two-inch wide elastic to the waist band since my wool fabric does not have the required
Saturday, March 22, 2014
Change in Plan
I was supposed to work on the plaid dress last weekend. Instead, I worked on tinkering on a knitting pattern, Mirroed Cable Swing Coat. Why? My last follow up visit to my eye doctor turned out more eventful than I anticipated: I had another retina tear which had to be fixed immediately by a laser surgery. I sometimes think my days with sight are numbered and get depressed.
At any rate, for this lovely swing jacket, I planned to use a different yarn, much thinner than the called-for yarn, Blue Sky Alpaca Bulky. My yarn is Louisa Harding Millais which is now discontinued unfortunately. This yarn has many gorgeous hues, very deep and iridescent in light.
I think the yarn manufacturers are not quite clear on what is supposed to be super bulky as both of these yarns are classified as such. Their gauges are so drastically different however: a width of 4" would require 8 stitches in Blue Sky Alpaca Bulky, while 12 stitches in Millais, 50% more than the Blue Sky yarn! They are far from the same. Perhaps "Super Bulky" means "Bulkier than Bulky."
So, I started to draw a diagram with all the stitch and row counts following the pattern instruction, convert them into length in cm, and re-calculated stitch and row counts for Millais using its recommended gauge. Since I was not so sure about the amount of the drape, too much it seems to me, I decided to knit from the center back towards either side. I started knitting on Friday night and I now have the right half completed. Looks like Millais produced a softer fabric.
At any rate, for this lovely swing jacket, I planned to use a different yarn, much thinner than the called-for yarn, Blue Sky Alpaca Bulky. My yarn is Louisa Harding Millais which is now discontinued unfortunately. This yarn has many gorgeous hues, very deep and iridescent in light.
I think the yarn manufacturers are not quite clear on what is supposed to be super bulky as both of these yarns are classified as such. Their gauges are so drastically different however: a width of 4" would require 8 stitches in Blue Sky Alpaca Bulky, while 12 stitches in Millais, 50% more than the Blue Sky yarn! They are far from the same. Perhaps "Super Bulky" means "Bulkier than Bulky."
So, I started to draw a diagram with all the stitch and row counts following the pattern instruction, convert them into length in cm, and re-calculated stitch and row counts for Millais using its recommended gauge. Since I was not so sure about the amount of the drape, too much it seems to me, I decided to knit from the center back towards either side. I started knitting on Friday night and I now have the right half completed. Looks like Millais produced a softer fabric.
Sunday, March 09, 2014
Plaid dress with Burda Style 118
I have been working on a dress for some time after finishing Christine Jonson Pencil and Slit Skirts early this year. I am hopeful that my sewing mojo is returning.
Fabric: I have had this piece of black and white wool plaid for more than thirty years. I visited this fabric just about every year contemplating what it could become, but I could not come up with any great ideas until this year. What is more, since it sat among my stash so long that it acquired two moth holes which I rewove to fill in with difficulty. The yarn of the fabric has small nubs and they got caught here and there, giving me such a hard time reweaving. At any rate, the moth holes were fixed tentatively.
The pattern: This is the dress. Actually, I never thought this fabric can become a dress. That was until I saw a photo of a Vivien Westwood tartan dress. It so happened some bloggers had already thought of this and my search provided me with this Burda Style dress. My fabric is probably a bit too bulky for the dress, but it is unlikely that I will encounter a better alternative. So, that was that.
Tinkering: Although the Burda dress has bias cut front, the back and the sleeves are not in bias. I decided to cut all parts in bias, except the back facing and the lining. The back pattern piece has a curved center back seam and a zipper is supposed to be installed there. Fearing the difficulty of matching plaid on the back and the lack of yardage (I have about 2 yards plus a bit), I decided to cut the back in one piece, and re-drew the center back seam as a straight line, which meant I had to move the zipper to the right side seam. The lining pattern for the front is also prepared.
All these pattern preps were done over two weekends. The fashion fabric was also cut out, except for the back facing. In the above photos, the left front drape is gathered up and pinned to back dress on my dress form. Looking at the back, it seems that the bias fabric has taken care of the form shaping and there is no need to add darts per pattern. I am letting the fabric to settle before I serge the edges and sew up the dress.
Cannot wait for the next weekend!
Fabric: I have had this piece of black and white wool plaid for more than thirty years. I visited this fabric just about every year contemplating what it could become, but I could not come up with any great ideas until this year. What is more, since it sat among my stash so long that it acquired two moth holes which I rewove to fill in with difficulty. The yarn of the fabric has small nubs and they got caught here and there, giving me such a hard time reweaving. At any rate, the moth holes were fixed tentatively.
The pattern: This is the dress. Actually, I never thought this fabric can become a dress. That was until I saw a photo of a Vivien Westwood tartan dress. It so happened some bloggers had already thought of this and my search provided me with this Burda Style dress. My fabric is probably a bit too bulky for the dress, but it is unlikely that I will encounter a better alternative. So, that was that.
Tinkering: Although the Burda dress has bias cut front, the back and the sleeves are not in bias. I decided to cut all parts in bias, except the back facing and the lining. The back pattern piece has a curved center back seam and a zipper is supposed to be installed there. Fearing the difficulty of matching plaid on the back and the lack of yardage (I have about 2 yards plus a bit), I decided to cut the back in one piece, and re-drew the center back seam as a straight line, which meant I had to move the zipper to the right side seam. The lining pattern for the front is also prepared.
All these pattern preps were done over two weekends. The fashion fabric was also cut out, except for the back facing. In the above photos, the left front drape is gathered up and pinned to back dress on my dress form. Looking at the back, it seems that the bias fabric has taken care of the form shaping and there is no need to add darts per pattern. I am letting the fabric to settle before I serge the edges and sew up the dress.
Cannot wait for the next weekend!
Saturday, February 22, 2014
Fluffy Gelsey
I started Gelsey while I was knitting Harris. It requires now discontinued Rowan Kidsilk Aura in two slightly different shades: Bark (darker brown beige with hint of green) and Antique Bronz (light gold/beige). Its stitch patterns are basically two row stripes with slipped and crossed stitches. When knitting two rows with the darker color, one stitch in lighter color was slipped every four stitches. When knitting rows with the lighter color, the slipped stitches were crossed with two adjacent darker stitches. By switching the direction of the crossing, right or left, the zigzag pattern emerges. Not complicated at all. Yet, its result is very sophisticated looking and its fabric is so plush, like a fur.
The design is by Marie Wallin and from Kidsilk Aura booklet. I was in love with Gelsey as soon as I saw it back in 2007, yet it took me so long to knit one.
Next up will be another Marie Wallin design, Bronwen, from Rowan Tweed Collection. I already started with it. I changed colors so that my Bronwen can be worn with navy trousers and skirts.
The wrong side:
The right side:
The design is by Marie Wallin and from Kidsilk Aura booklet. I was in love with Gelsey as soon as I saw it back in 2007, yet it took me so long to knit one.
Next up will be another Marie Wallin design, Bronwen, from Rowan Tweed Collection. I already started with it. I changed colors so that my Bronwen can be worn with navy trousers and skirts.
The wrong side:
Monday, January 20, 2014
Harris and Vogue 8859
My Harris is finally completed. It is gorgeous with perfect fit, light weight, and warm. This is not a project to plunge in and finish without distraction. One needs to maintain sanity when dealing with intarsia. At least I did.
I used the specified yarns in the exact colors. I have one ball each of Peat and Kisdon untouched. I am wondering why I have so much leftovers. For the single-row stripes, I did the following: knit one row with Peat, without turning the fabric knit one row with Kisdon by going back to the right edge of the fabric, turn the fabric to wrong side and purl 1 row with Peat, and without turning the fabric purl 1 row with Kisdon by going back to the right edge of the fabric (wrong side). This method worked fine until I met with armhole shaping. When you are to do "decrease X stitches at the beginning of the next two rows," you may not be able to do so unless you are on the second knit row or the second purl row: i.e. even numbered rows. At any rate, I fudged a little and the finished garment suffered no evidence the problem. I am wondering if the method I used is the reason for extra yarns.
The only change I made was pockets. Instead of single layer of pocket linings which are to be sewn onto the bodice, I knitted them twice as long for double layer. For the ribbed pocket edging. I picked up stitches from the bottom of the pocket lining and knitted them together with bodice stitches on a waste yarn. I also anchored the bottom corners of pocket linings to the top of the ribbed bodice hem.
One more thing. In the photos above, I am wearing newly sewn Vogue 8859 with my regular pant modifications. I used a thick rayon double knit with 2% Lycra from my stash. I love the long pants covering my short boots, and providing me with an illusion of longer legs. Highly recommend the pattern.
I used the specified yarns in the exact colors. I have one ball each of Peat and Kisdon untouched. I am wondering why I have so much leftovers. For the single-row stripes, I did the following: knit one row with Peat, without turning the fabric knit one row with Kisdon by going back to the right edge of the fabric, turn the fabric to wrong side and purl 1 row with Peat, and without turning the fabric purl 1 row with Kisdon by going back to the right edge of the fabric (wrong side). This method worked fine until I met with armhole shaping. When you are to do "decrease X stitches at the beginning of the next two rows," you may not be able to do so unless you are on the second knit row or the second purl row: i.e. even numbered rows. At any rate, I fudged a little and the finished garment suffered no evidence the problem. I am wondering if the method I used is the reason for extra yarns.
The only change I made was pockets. Instead of single layer of pocket linings which are to be sewn onto the bodice, I knitted them twice as long for double layer. For the ribbed pocket edging. I picked up stitches from the bottom of the pocket lining and knitted them together with bodice stitches on a waste yarn. I also anchored the bottom corners of pocket linings to the top of the ribbed bodice hem.
One more thing. In the photos above, I am wearing newly sewn Vogue 8859 with my regular pant modifications. I used a thick rayon double knit with 2% Lycra from my stash. I love the long pants covering my short boots, and providing me with an illusion of longer legs. Highly recommend the pattern.
Sunday, December 08, 2013
Bonbori Curio
I love Curio for its dolman sleeves and wide ribbed band on the model. Yet, I was not sure about the design when reviewing the schematic. Looks too wide?
Changes made:
- Cast on fewer stitches (78 stitches) and increased every 6 rows 6 times after switching to the stockinet stitch (90 stitches). Once at underarm, the length of the gathered fabric was knitted, not the flat fabric. Then, I decreased at each end to shape shoulders by casting off 4 stitches at the beginning of every row for 12 times, and 6 stitches two times, with 30 stitches left on the needle.
- Sleeves were knitted per instructions, except I did not cast off stitches at the end. I grafted live stitches onto the bodice to reduce bulk.
- For the
assembly, I used half stitches for seam allowance in order to reduce the bulk
of the seam.
Tuesday, December 03, 2013
Katia Lace Pullover
I love this lace pattern. Something different from other lace patterns I've knitted.
The edging with double or triple strands worked well.
I think it might be very interesting when combined with stripes.
The edging with double or triple strands worked well.
I think it might be very interesting when combined with stripes.
Sewing Mojo
I have been struggling with motivation. Not for knitting but for sewing. Having had eye sight problems since January of this year has been one factor as sewing require good eyes. But, I might be making that an excuse for my lack of motivation. Well, I had frozen shoulders and that compromised me more than I can think of. So, I just need to nudge myself back into sewing slowly. I tend to think of sewing as one long and continuous process. That is the major issue I need to amend. I do not have such continuous time for myself. I need to learn to feel comfortable with planning multiple steps into a sewing project. I tend to get frustrated easily with sewing when I cannot accomplish intended tasks. So, here we go. I am going to take a few steps at a time in sewing.
I have a beautiful black wool double knit for about 2 yards, probably a bit more. I have been meaning to sew it into skirts. I do not have warm black skirts. I want something different than a simple tube skirt, a skirt with rectangle piece sewn together on center back seam and an elastic band casing at the top to go with. So, what did I choose? I purchased Christine Jonson's Pencil skirt pattern.
The pattern package includes two long skirts, Pencil skirt and Slit skirt, both very stylish and with slits in the center back. They have quite a lot of negative ease both at waist and hip. And, they are for cotton lycra knit fabric with 100% recovery.
I have enough fabric to make both Pencil and Slit skirts. So far, so good. Nor really. Actually, it took me such a long time to decide on the pattern that I don't remember when I took out the fabric and decided that I need skirts. It might have been a year ago or more. Sigh.
Next task, sizing. Although my black wool double knit is not very thick, it does not have the recovery required by the pattern. So, I chose one size larger for my measurements. I shortened the skirt length by 4" and I made the hem width a bit wider for Slit skirt. I was so indecisive and took me too long to make up my mind on sizing: a few days, on and off. This indecisiveness makes me feel very unproductive and makes me feel like going back to knitting. I had to fight it out by telling myself that I need black skirts.
I hope to find some time to cut the fabric this week: two to three hours for two to three skirts should be possible, right? Wish me luck!
I have a beautiful black wool double knit for about 2 yards, probably a bit more. I have been meaning to sew it into skirts. I do not have warm black skirts. I want something different than a simple tube skirt, a skirt with rectangle piece sewn together on center back seam and an elastic band casing at the top to go with. So, what did I choose? I purchased Christine Jonson's Pencil skirt pattern.
The pattern package includes two long skirts, Pencil skirt and Slit skirt, both very stylish and with slits in the center back. They have quite a lot of negative ease both at waist and hip. And, they are for cotton lycra knit fabric with 100% recovery.
I have enough fabric to make both Pencil and Slit skirts. So far, so good. Nor really. Actually, it took me such a long time to decide on the pattern that I don't remember when I took out the fabric and decided that I need skirts. It might have been a year ago or more. Sigh.
Next task, sizing. Although my black wool double knit is not very thick, it does not have the recovery required by the pattern. So, I chose one size larger for my measurements. I shortened the skirt length by 4" and I made the hem width a bit wider for Slit skirt. I was so indecisive and took me too long to make up my mind on sizing: a few days, on and off. This indecisiveness makes me feel very unproductive and makes me feel like going back to knitting. I had to fight it out by telling myself that I need black skirts.
I hope to find some time to cut the fabric this week: two to three hours for two to three skirts should be possible, right? Wish me luck!
Saturday, November 30, 2013
Lace Coat, Finished!
I undid all the edgings and re-worked them.
It looks much better than before, don't you agree?
I made button holes in simple Tunisian fabric, by skipping a vertical bar going forward, and adding a chain on the way back. I placed the button holes so that buttons are next to Tunisian stripes, not the broomstick lace stripes.
I am so relieved that all my efforts did not go to waste.
It looks much better than before, don't you agree?
I made button holes in simple Tunisian fabric, by skipping a vertical bar going forward, and adding a chain on the way back. I placed the button holes so that buttons are next to Tunisian stripes, not the broomstick lace stripes.
I am so relieved that all my efforts did not go to waste.
Sunday, November 24, 2013
Lace Coat from Vogue Crochet 2012
I have been working on design #37 Lace Coat
by Lisa Daehlin from Vogue Knitting Crochet 2012 magazine. I finished the coat for now but I am not satisfied with the results. I will be working on it further, probably sometime later after figuring out what I need to do.
I used beautiful Lang Jawoll Magic yarn in 84-18, black and dark green mix. The yarn is very loosely plied, almost single to my eye.; I used 5.5 mm crochet hook and 25mm knitting circular needles mostly, but used a smaller hook for picking up loops.
What I like about the coat is the very lacy main fabric. What I do not like is the front bands. The neck and the bottom edgings are okay as they are, although I would like to have a bit firmer feel along the neck. In order to re-do front bands, I will need to remove the neck band and the last row of the bottom band since they were applied after front bands were completed. Bummer! I am going to leave the coat on the dress form for now.
I used beautiful Lang Jawoll Magic yarn in 84-18, black and dark green mix. The yarn is very loosely plied, almost single to my eye.; I used 5.5 mm crochet hook and 25mm knitting circular needles mostly, but used a smaller hook for picking up loops.
What I like about the coat is the very lacy main fabric. What I do not like is the front bands. The neck and the bottom edgings are okay as they are, although I would like to have a bit firmer feel along the neck. In order to re-do front bands, I will need to remove the neck band and the last row of the bottom band since they were applied after front bands were completed. Bummer! I am going to leave the coat on the dress form for now.
Saturday, November 09, 2013
Cautionary Tale on Knitting
Do you wash your swatch?
What you see above are two sleeves knitted exactly alike, but one of them was soaked in water thoroughly and dried. See how much the yarn had relaxed? Soaking in water did not affect the width in the above case, but the length was increased by about 20%.
Sunday, November 03, 2013
Broomstick and Tunisian Lace
Light weight and lacy fabric in dark green and black.
Love it!
There are forums on Ravelry where this lace coat project is discussed. They are so helpful. I highly recommend reading them all before starting the project. I was buffled with the instructions on sleeves initially. With some logical thinking and reading posts by trailblazing Ravelrers I am feeling confident in finishing this project.
Love it!
There are forums on Ravelry where this lace coat project is discussed. They are so helpful. I highly recommend reading them all before starting the project. I was buffled with the instructions on sleeves initially. With some logical thinking and reading posts by trailblazing Ravelrers I am feeling confident in finishing this project.
Saturday, October 26, 2013
Fall Projects
Harris pullover
with pockets from Rowan Magazine #52.
This issue of Rowan Magazine has so many designs I love. This project is the third one from it. What I like about this pullover include pockets and single row stripes.
However, knitting it turned out to be a challenge. See the tangle on the photos below. I find myself getting frustrated with the tangle after 10 rows or so. This is going to be a slow project. Hence, I had to come up with a simpler second project.
A lace pullover from Katia Magazine #52 is my simpler project. I’ve had this project sitting in the bin next to my armchair for a while. It is knitted with a cotton yarn: i.e. a summer project. Nevertheless, it will be my simpler project.
Instructions on Katia Magazines are a bit different from others: each row is charted as you face them. Stockinet stitches are charted with blank cells for odd rows (knit) and with dashed cells for even rows (purl), while garter stitches are charted with blank cells on both odd and even rows. In Japanese knitting books, stockinet and garter stitches are charted in completely opposite manner (all cells blank for stockinet). Once you realize that, it is okay. But not always. For this particular design, Katia's charting method does not seem to work well. I had to replace k2tog done on reverse row to p2tog or p2tog tbl. I could discern these errors by inspecting the photograph. I am knitting a sleeve first.
An extra project in preparation for #37 from Vogue Crochet Magazine from 2012, involving broomstick stitches. Since I was not certain about how to do broomstick lace, I bought Doris Chan's Crochet Lace Innovations. I love this book for three reasons: broomstick lace instructions and designs, hairpin lace instructions, and her foundation single crochet stitches. I am working on Soolin belt from her book. The bottom photo shows the foundation single crochet stitch. It is much nicer and stable than chain stitches.
That’s all.
However, knitting it turned out to be a challenge. See the tangle on the photos below. I find myself getting frustrated with the tangle after 10 rows or so. This is going to be a slow project. Hence, I had to come up with a simpler second project.
A lace pullover from Katia Magazine #52 is my simpler project. I’ve had this project sitting in the bin next to my armchair for a while. It is knitted with a cotton yarn: i.e. a summer project. Nevertheless, it will be my simpler project.
Instructions on Katia Magazines are a bit different from others: each row is charted as you face them. Stockinet stitches are charted with blank cells for odd rows (knit) and with dashed cells for even rows (purl), while garter stitches are charted with blank cells on both odd and even rows. In Japanese knitting books, stockinet and garter stitches are charted in completely opposite manner (all cells blank for stockinet). Once you realize that, it is okay. But not always. For this particular design, Katia's charting method does not seem to work well. I had to replace k2tog done on reverse row to p2tog or p2tog tbl. I could discern these errors by inspecting the photograph. I am knitting a sleeve first.
I learned a new cast on technique in this Katia project. See the photo above. The main lace stitches are knitted with 4.5 mm or 5.5 mm needles, while cast on stitches were done with 6.5 mm and with three strands of yarns held together. I used 7 mm needles as I do not have 6.5 mm ones. With this method, you can plunge into the lace pattern from row 1 and there is no curling.
An extra project in preparation for #37 from Vogue Crochet Magazine from 2012, involving broomstick stitches. Since I was not certain about how to do broomstick lace, I bought Doris Chan's Crochet Lace Innovations. I love this book for three reasons: broomstick lace instructions and designs, hairpin lace instructions, and her foundation single crochet stitches. I am working on Soolin belt from her book. The bottom photo shows the foundation single crochet stitch. It is much nicer and stable than chain stitches.
That’s all.
Subscribe to:
Posts (Atom)