Saturday, April 14, 2007

Rose beads on Margaret Tudor

Fellow Knitsmiths, Nancy, has taken time for me to select some beads for Margaret Tudor. She has her atelier on Newbury Street and is close to a bead shop. I trust her taste for good reason. The first choice, matt finished beads shaped like a rose.


The second choice, oval shaped beads with considerably shinier finish.


We decided that the first is the right one. Its round shape and 'rose' are perfect features for this design, don't you think? I am now finished with 10 panels! That is, all the body panels are done. I went ahead and assembled all the body panels except for the side seams and knit the neck band and hem bands. I made the body narrower by eliminating 12 stitches from front and back bodies, keeping the armhole shaping and neck opening intact. This means that the shoulder width is narrowed by 6 stitches and I was anxious to find out how much I need to lengthen sleeves. After trying it on, it was clear that I need to add quite a lot to the sleeve length: one more thistle pattern needs to be added. I think I got lucky. Just a minor math of adjusting the increase pattern.

Sunday, April 01, 2007

Lizard Ridge Afghan finished!


I used 24 balls of Noro Kureyon to knit 30 panels. For the edging, I was not quite satisfied with the original pattern instruction and did somewhat fancier version from this pattern book by Hirose Mitsuharu.
オリジナルより大きめにしたかったので、野呂さんのくれよんを24玉使ってパネルを30枚あみました。エッジングはKnitty のパターンにしたがわず、広瀬光春さんのパターンを使いました。

Pardon me for the poor quality of the close up below. Hopefully, you get the idea of what was done differently.
あまりよく撮れてませんが、エッジングのアップです。


It was an absolutely fun and satisfying project from the beginning to the end. I don't know how Mr. Noro Eisaku does it, but his colors are just gorgeous. They are really captivating. The designer, Laura Aylor, used Kureyon so cleverly. I am grateful to both! DDs were impressed more than any other projects I've ever done. They requested to have one each. We shall see.
最初から最後まで、興味を失うことなく随分速く編めました。 野呂栄作さんの糸の色使いは素晴らしく、一度編み始めるとなかなか止められません。 デザイナーのLaura Aylorさんの引き返し編みの使い方には慣れるまで少し手こずりましたが、よく出来ています。 私の娘たちも気に入って、欲しいと言われ、ニッコリです。

追記: 日本語で書くのって、ずいぶん難しいです。おかしな日本語になっているかもしれません。 これから、少しずつ日本語で書くつもりです。 宜しく!

Saturday, March 31, 2007

Five Panels for Margaret Tudor


Finally assembled, just for the back, though. Close up below.


Nine more panels to go!

Monday, March 26, 2007

Thirty Panels for Lizard Ridge Afghan


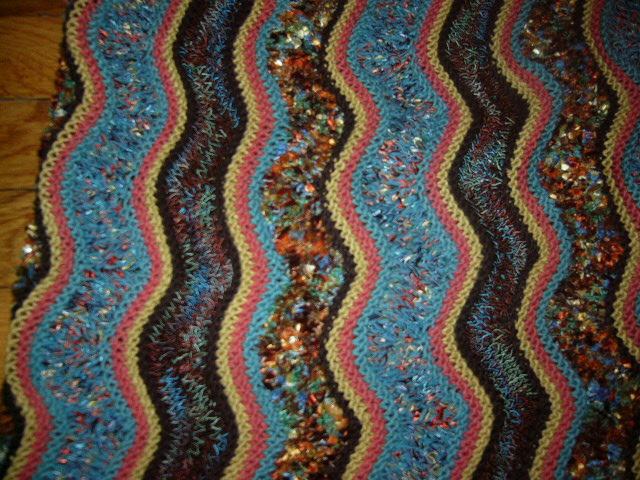
Finally finished knitting all the panels for Lizard Ridge Afghan. The designer really knows how to use Noro yarns. This wave pattern can work perfectly beautifully in garments, especially skirts, I think.

Wednesday, March 14, 2007

VK Capecho


This is not for myself, but for my DDs.


I used Elann's Esprit in Natural with 4 mm needles and knitted size S. I followed the pattern as written through Pentagon 11. For sleeves, I cast on 15 stitches to prevent extra material at underarm. Also, only one side of Pentagons 8 and 9 contribute to the bottom hem, rather than 2 sides. The sides adjacent to the sleeve pentagons were brought to the back and stitched onto the back hem, resulting in considerably smaller hem circumference. My daughters are 9 and 11 years old. I think they look rather cute in it.

For more views go here.

Saturday, March 10, 2007

Sewing Workshop Tribeca Jacket


This is a sewing pattern from The Sewing Workshop. They are one of my favorite independent pattern companies. I followed their additional instructions found in their gallery page and made the shirt into a jacket: fully self-faced front bodice and partially self-faced back.


Instructions were good and easy to follow. I made some changes and did not follow them exactly, however. The body was shortened by 2 3/8" for the front. The original pattern has standard 5/8" seam allowance and the hem allowance is also 5/8" everywhere. This was great for the doubled front bodice. For the back, I wanted add more substantial hem, and it was shortened by 1" only to create 2" hem, original 5/8" seam allowance plus 1 3/8". Sleeve hems were also widened to 2". The side back seams were encased by the doubled front bodice, eliminating raw edges along sides completely. The photo below shows the side seams in the center.


The blue one was intended to match St. Charles-Noro outfit. I think the beige one is the better choice, don't you?


I just love the way the button is framed. Little detail but makes a big difference. I used cross grain to make them show more.


If you are interested in more photos of the outfit, please visit
here.

Flower Shawl by Shida Hitomi


I discovered Ms. Hitomi Shida's knit work only recently, last summer to be exact. Her knit designs are very intricate and gorgeous. The above issue is the most recent one. She also published a collection of her designs from past issues of Couture Knit (Let's Knit Series).


There is a gorgeous flower shawl in the recent issue. You can take a look by clicking the second button on the right panel here.


A friend of mine is interested in this design and I am attempting a translation of the text below. For the stitch pattern, you will need the book.

The yarn used is Dia Keito Dia Couture Silk Lame. Scroll down to page 15 to see the colors and the yarn specs. The required amount is 340g or 9 balls. The knitting needles used is Japanese size 6, which is about 4 mm. Also required is a crochet hook size 5/0, or 3 mm. The gauge is 31 rows in patterned stitches per 10 cm.

Cast on 7 stitches and follow the charts. The forth cast on stitch is at the center and indicated by a darker shade in the charts. Purl all the stitches on wrong side. Rows 27 through 50 are repeated five times: for rows 51 through 74, repeat the stitches indicated by the blank start twice, for rows 75 through 98, repeat three times, for rows 99 through 122, repeat four times, and for rows 123 through 146, repeat five times. For rows 147 through 170, repeat the stitches indicated by the black star 6 times, and for rows 171 through 190, repeat the marked stitches 7 times.

Here is the Flower Shawl from the book. Sorry for the poor quality of the photo.

Sunday, March 04, 2007

Bergere de France Tank Top


This is the cover of the Magazine Tricot no. 123 issue by Bergere de France where I found beautiful tank tops. I believe it was published in 2003. I acquired the magazine in early 2004 with help of Sandrine and Michelle.

I was not much interested in knitting tank tops until I saw this photo (cover tank top) and this one (twin set) by Sandrine. Once I saw these beauties, I had to knit them.


Here is the twin set.

In early 2004, the magazine was already all sold out and out of print. Those who are interested in knitting these tanks need to contact Bergere de France directly and request reprinting. I hope they would oblige. Once you get the pattern, you need to deal with French instructions. I was lucky enough to know a fellow knitsmith, Alison, who generously offered to translate the pattern for me.

Next, which yarn to use? The gauge of the cover tank is 33 stitches and 49 rows per 4" square, between fingering and lace weight. I picked up Sandnes Mandarin Petit and began knitting. The orange one below is my first version. My gauge was quite off and I had to do a lot of adjustments. The horizontal eyelet bar was right across my bust which I thought was not appropriate. So, I did the second version with Rowan cotton 4 ply, moving the bar further down. BTW, this yarn was no better than Mandarin Petit. Too thick for the tank. I actually knitted the whole thing optimistically thinking it would be just fine. When I completed it, it was obvious, I made a giant tank. I ripped the whole thing all the way down to the leaf motif band in 30 minutes. Eventually, I got it knitted up. You can see me wearing them here. Which one looks better? Orange one, right? BdeF designer knew better.


As a headstrong knitter that I am, I had to find the right yarn: Pearl Cotton 5/2 on size 2.25 mm needles. Unfortunately, the third version remained as shown below for more than a year. Simply, it was not fun knitting at all.


Eventually, I convinced myself I cannot have it unfinished and began working on it.

This time, success!! I simply followed the pattern as is. Phew!!


Added: Here is something I just found on Bergere de France. You may want to take a look.

Tuesday, February 13, 2007

Margaret Tudor


I have been knitting this pullover for many months, on and off, for some years. There are 16 panels to this garment and I was up to 8 done yesterday. Today, I have two less. I found out that I got mixed up with k2tog and ssk. I knew something was not quite right, but I never took time to look more carefully ... until yesterday.

Surprisingly, even after unraveling two side panels, my interest level in this project is quite high. My mind is on buttons. I don't want to use buttons as specified. Instead, I am thinking of some beads, onyx or garnet beads.

Monday, January 29, 2007

What I've been busy with


These handbags are based on very talented Kate's pattern which you can request for at her blog. She has an excellent FAQ site as well. It was great when I had to face K11tog challenge.

For the lime version, I used 6 balls of Idéna Cotton Lux in color 570, and four skeins of On-Line Clip color 57 for the aubergine version. The latter is a heavier yarn and the handbag is bulkier and more textured. The handles are from MJ Trimming. I just had to use these faux tortoise ones.

In order to fit the handles, I reduced the number of stitches at the top by 1/3. Once the knitting was done, the dimensions of the bag were determined. I wanted the bag to be heavily textured. For that, the lining had to be smaller than the knitted fabric, particularly in height.


The width of the lining is the same as the knitted fabric.


The paper pattern piece seen above has 5/8" seam allowances at the bottom and sides. The top will be flash with the handbag opening and no allowance is added. The lining has three layers: black fabric as outer lining, heavy fusible interfacing, and cotton print as inner lining.

First, the outer lining was constructed by fusing the interfacing to the wrong side of the black fabric, sewing the bottom and two sides with right side together, turning inside out, and ironing it to shape.


The inner lining has pockets which was made with the same cotton print. For firmer pocket, the same interfacing was fused to one side only.


The finished pocket piece was sewn onto the right side of the inner lining fabric.


Sew the inner lining like the outer lining. As you can see in the photo above, the inner lining was cut on fold along the bottom.


Slip the inner lining into the outer lining as shown and sew the top edge through all three layers.


With the wrong side out, place the knitted bag under the lining. At this point, the knitted bag is much larger than the lining.


Tack the lining to the knitted bag at four corners and between corners.


Here is a close up of tucking.


Now, it is time to flip the bag right side out! The bag has the nice shape I wanted.


Hand sew the knitted facing onto the lining, attach the handles, and DONE!!

Friday, January 05, 2007

Stacy Charles - Noro Outfit


This outfit began with a skirt. Its pattern is based on #18 ZigZag Skirt from St. Charles Collezione Summer '05. Textured yarns and solid colored yarns are cleverly combined to create vertical zigzag patterns which attracted me very much.


Then, one day, I came across K1C2 Tartalette #641 at my LYS. Its blue and orange combination caught my eyes. That was it. Next, I picked up Noro Daria #12 and St. Charles Rialto #29 for textured yarns and various cotton/silk/wool blends in orange, blue, mustard yellow and chocolate brown, all solid colors but not necessarily in the same gauge range. The only concern was Noro Daria. Would a stiff cable work with other yarns? I felt so strongly about the colors being right, it was decided that I have to make it all work together.


The original garment photos are shown on the left. The skirt has a yoke with a cord threaded at the top to keep the skirt in place, and is matched with a collared tank. Several changes were made to the original pattern. I added an elastic casing to the top of the yoke and decided not to wear the skirt on the hip. The matching tank did not suit my taste and was replaced by a tank top from Katia knitting magazine from a few years ago. Casting on and off with solid colored cotton blend yarn, Noro Daria tank worked out fine. I completely ignored the recommended gauge on Noro Daria, however.


Here are the covers of the magazines used. I needed two balls each of Tartalette and Rialto, three balls of Noro Daria, and one ball each in four solid colors for the skirt. For the tank, 7 skeins of Noro Daria were needed.


I am still working on the outfit. I am planning to sew a light jacket with silk sateen in smokey blue. At the moment, I am planning to use The Sewing Workshop's Tribeca Shirt pattern.

Sunday, December 31, 2006

Jumping in


Oh, what the heck! I am going to start my blog on my creative activities. See you next year!