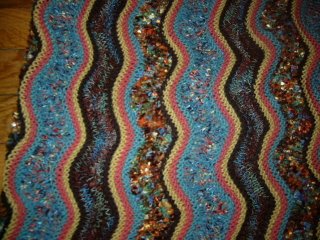
Showing posts with label Cardigan. Show all posts

Sunday, June 16, 2013

Lovely Orkney Cardigan, Part 2

Now a shocking discovery to report. I made a major error in knitting the bodice of Orkney: I forgot to make button holes. I was drawn to Orkney for its clean front edge without button bands, yet I forgot to knit button holes! I realized this error when I was decreasing stitches at shoulders. Too late, I said. I need to figure out how I could force button holes.

I recalled reading about button holes can be made after completing by manipulating yarns around a stitch. That’s what I decided to do. I was worried that ‘manipulation’ and ‘coaxing’ of yarn might cause too much wear and tear. In order to provide some support, I decided to use petershams for facings instead of knitted ones.

Here is what I did. I used 1” wide petersham tape for the left front, and two stripes of ½” wide tapes, sewn together except for button holes, for the right front. After the petershams were applied, I gently forced button holes on the knitted bodice. Ah, when I was applying the petershams, I realized that my steeks was too wide since the button hole had to be made through steeks as well. This was to be avoided. So, I had to re-work crochet anchoring and cut off excess.

The photo below shows the left front facing sewn on, and the right facing being assembled.


The right facing sewn on the right edge with button inserted in the button holes. 


And, here is it.  Finally done!  All the buttons are sewn and corresponding holes are made.


One more note on the project. The color Mineral was used in sleeves only. I have a lot of it leftover. The yarn amount was all sufficient even though I added steeks. The least amount left was in Billberry.


It is too warm to wear Orkney now.  Must wait for some cooler days to come back. 


Saturday, June 15, 2013

Lovely Orkney Cardigan, Part 1

First of all, I love the colors in Orkney. The colors of Rowan Felted Tweed yarns are so well coordinated that any combination of the muted hues seems to be pleasant and beautiful. I also love the clean front edge without button bands. Since the magazine came out, I was in love with Orkney.

One thing I did not like about the design was its instruction, written to knit pieces in flat, back and forth. Like many knitters, I dislike knitting Fair Isle designs flat. I decided to add steeks to bodice and sleeves. Yes, sleeves. Since knitting in circle with small circumference is not my forte and I have tension issues, I decided to knit two sleeves together with steeks added between them.

So, I began knitting sleeves as I often knit them first as a swatch alternative. I was lucky this time and stitch gauge was spot on. My row gauge seemed okay as well. I knitted two cuffs flat first so that steeks won’t show at the cuff edges, and placed them together on a circular needle with eight-stitch steeks added. It so turned out I could have used six- or four-stitch steeks since there are edge stitches. Instead of following the pattern instruction in words, I followed the chart. As I could not see the line for the size M clearly in it, I ended up with having six extra stitches, three on each end, for size M. In order to accommodate this addition, I increased the armhole depth somewhat.


Fronts and beck bodices were also knitted together with an eight-stitch steek added between the fronts (this should have been a four-stitch steek so as not to have too much fabric at front edges). I cast on 248 stitches for the ribbed edge and knit: k3, k2 p2, repeat * to , k3 (the first and the last stitches are edge stitches). On row 1 of the Fair Isle section, add two stitches to front bodices and one stitch to the back bodice, with the total of 253 stitches for bodice. I placed markers after 65th and 188th stitches to indicate the side seams. Also I marked the center back stitch to aid anchoring the motif. When the Fair Isle chart was inspected, I noticed that the center back is not necessarily the middle of each motif. I shifted motifs as necessary to remedy this defect. I decided to make the cardigan longer and chose to knit 35 cm before armhole shaping began. Also, the armhole was lengthened to 21 cm.

Here are bodice, left, and sleeves before cutting steeks. 


Sleeves alone.

 
And after sleeves were put together.


I found the sleeves to be just right in tightness and the cuffs are nice and snug.  Some knitters mentioned sleeves being tight and I am wondering if it was due to knitting them in round in small circumference. 

I just adore the colors of the garments!  Now, the next post will be about a disaster and how I overcame it.


Thursday, April 09, 2009

Orange XOXO Cardigan

DD2's been looking for a long and roomy cardigan for a while. We could not find one in children's, teens’, or women's clothing stores around here or on internet. She has a relatively clear idea on how it ought to look and feel, and that makes it impossible to find the exact one. So, I decided that she needs my help.

We started with yarn selection: not scratchy wool, not a bulky yarn, soft and delicate, and in orange, her favorite color. We ended up with acrylic/wool blend in bright orange from Bergere de France. I purchased a pattern CD and ordered the yarn for her last fall.

Next, pattern. Not quite willing to design the whole cardigan from scratch, I looked for girls' cardigan/pullover patterns. Even if DD2 was not quite sure about the photos I've shown her, I decided to order a Phildar Enfants issue. There are two designs I thought might work for her ideas. Design 14 with lots of 1-by-1 ribs but roomy lower bodice and Design 4 with some interesting cables. Main issue is that I like to knit interesting patterns while DD2 does not like ‘fancy’ clothes for a special occasion. She wants everyday sort of clothes. Basically, she likes a lot of stockinet stitches. This is bad news for me. In order to make miles of stockinet stitches less boring, I added a variegated lace weight alpaca yarn from my LYS. It is called J. Knits Lace-A-Licious in pink color, Providence. It added a nice hand and color interest to the fabric without itchiness.


With DD2's desire in mind, I combined the two designs from the magazine: roomy lower bodice and fitted upper bodice of Design 14, XOXO cable pattern of Design 4, and ample sleeves but not too baggy. Even though DD2 resisted the idea of adding cables, she loved XOXO pattern. So, I happily knitted the orange XOXO cardigan.


She loves the result! Thanks goodness!!

Tuesday, March 10, 2009

Yellow Tweedy Cardigan

I started to knit this cardigan on January 1, 2009. It is knitted with about 7.2 skeins of Peace Fleece in Khrushchev Corn Yellow. I love this shade of yellow.


I bought this yarn a few years back, way before Ravelry, when I visited yarn stores in Maine and New Hampshire with my knitting friends. Ordinarily, I would not consider yellow for myself, but this one was different. I am not a color theory expert and I have no idea what makes this yellow so different from the other ones. I fell in love and bought some skeins without having a particular project in mind.

Then, came Ravelry. After becoming a huge fan of Norah Gaughan, I would look for her designs and marvel them on Ravelry. Then I happened to see Norah's Tweedy Aran Cardigan from Interweave Knit magazine 2001/2002 issue in many different yarns and colors. Some of the finished projects were actually knitted with Peace Fleece. Then, I knew that I had to knit it with my yellow Peace Fleece. Given such a useful tool as Ravelry, I started to study the finished garments. I noticed that I liked versions which looked much longer than the others. I thought the longer versions show off waist shaping better. I also looked at button choices made by fellow knitters. Truly, Ravelry adds such an interesting dimension to knitting.

Now, about Norah's pattern. I love her fancy rib stitches: very stretchy and highly textured rib stitches. I almost thought of using them for entire sleeves but I decided that it might be too much for my poor wrists as this yellow Peace Fleece was quite hard on my hands in twisted stitches and cables. The photo below shows the texture of the fancy rib stitches best.


To make my life easier in executing fancy rib stitches, I took an extra step and rearranged stitches for easier knitting: Slip the first stitch to the right needle purl-wise and slip the second stitch knit-wise. Place these two stitches back to the left needle. Notice that the right leg of the second stitch is now easier to access from the back. Proceed by knitting into the second stitch’s right leg, and, without removing stitches from the left needle, knit the first stitch’s right leg. Remove both stitches from the left needle. Note to self: Fancy rib stitches eat up a lot of yarn. Estimate more yarn if I ever knit the same cardigan and use the stitch on sleeves.

Here are the changes I made: Lengthen the bodice by about 2" and to add more waist shaping (instead of 5 times, I did 7 times). Instead of making button holes involving just one yo, I chose to use a similar method I employed for Winter Wonderland Coat and did one-row button holes over three stitches. The modification was made to strengthen the right edge of the holes. Cast off the first stitch by slipping it over the last stitch on the right needle (it looks like k2tog). The next two stitches are cast off without using the working yarn by simply slip the stitch over the next stitch twice. Turn the work around and cast on four stitches using cable cast on method. Turn the work around and knit (or purl) the first stitch on the left needle with the last cast on stitch on the right needle. For this last step, the last cast on stitch must be transferred to the left needle first.

I found nice black horn buttons with notches etched on the surface, mimicking the fancy rib stitch pattern. Overall, this was a quite satisfying project.


I noticed that it goes very well with my Noro Sock Scarf recently finished.

Tuesday, July 29, 2008

Lucy in Venezia

Once I won eight balls of ribbon yarn in wonderful light mint green shade on Ebay. It is a bulky ribbon yarn called Filati Bertagna Venezia and has about 99 yards per ball. Eight of them did not seem enough and I went back to Ebay, but I could never win them again. It was about five years ago and they cost me less than $15!

What could I knit with 800 yards of yarn? I had no idea initially and the yarn sat there for a few years. Then Rowan 37 came out and I saw Lucy. It is a cardigan with overlapped front bodice pieces which are buttoned up at the top section only. It has a wide lace border on the body and the sleeves are entirely knit in lace pattern: a very cute cardigan suitable for cold office in summer. Although it is not knitted with a thin ribbon yarn, it requires a bulky weight yarn and the quantity was sufficient. I was going to knit it up right away. Instead, it sat a few more years until now.

As always, I put my fall/winter projects away in late spring. I pulled out my summer projects out of their hiding place and saw the ribbon yarn, its color being still wonderfully fresh and beautiful to my eyes, and I remembered what I was going to knit with it. After completing last year’s UFOs, I immediately cast on Lucy, thinking I have enough yarn and the weight is perfect. Well, it was almost perfect, but with a few big surprises. The lace pattern gauge was about the same, but the stockinet stitch required so much lower stitch and row counts. This is good news for someone who once worried about not having enough yarn. Revised the pattern according to my gauge and started knitting the back. I used up almost 3 balls, three out of eight. I had two front pieces and two long sleeves to knit with the remaining five balls!

What I did next was to cut where ever it was possible. Front pieces cannot be overlapped so much, just enough to button them up. Also, I can lower the front neck line. Sleeves could get shorter. With all these cut backs, I made it. It turned out a bit different from the Rowan version, but it is cute enough to me. I love the red button against this pale mint color. I had this button for a while, but again, I had only one of them. It was shaky in the middle of the process, but it turned out all so nicely in the end.

Tuesday, July 08, 2008

Where is my time?

I cannot believe it is been a month since I posted on Green Manon! Where did my time go? June seems to go by so quickly since DDs started to go to their elementary school. Not that I did not have time to knit, but I certainly did not have time to relax and think. I knit here and there throughout the day, and that adds up especially with a small summer garment.


This is a summer cardigan I began knitting last summer. It was almost forgotten in one of my many knitting bags. Since I had stopped knitting in the middle of a front bodice and did not make any notes on where it was that I stopped, I had to figure that out first. This should teach me a lesson. Once I managed to decipher my handwritten notes, it was rather smooth sailing. The only trouble is the yarn. It is a cotton and nylon blend from Elann.com. I love the color, but I am not that crazy about the feel of the fabric. It is rather rough to touch. What’s worse is that it is really hard to ‘read’ stitches. The pattern on the other hand is just gorgeous. It is from Bergère de France no. 123. I thought that the booklet was out of print, but I recently learned from Ravelry that it can be ordered from their website with reference number 19409 under Commande tab. In any case, I just adore little eyelet rows between different lace patterns and along the front and neck edges. They are quite functional as well as decorative. The pattern has six rows total with all the rows knitted in garter stitches. The eyelet stitches are knitted on the fourth row, facing the wrong side of the fabric, with yarn over and k2tog repeated. Definitely nice little detail to be used again and again.

Sunday, February 10, 2008

Cardigan for Father

I had this idea of knitting a cardigan for my father for his 50th anniversary when I was knitting Mother’s shawl and saw this Rowan book for men. Martin Storey’s Reverse Stripe Sweater got my attention. I love stripes but never tried reverse stripes. Using Rowan Felted Tweed in this pattern makes even more interesting fabric. The only problem is Father hates pullovers as they mess up his hair, and he does not wear brown colors. I bought Midnight and several other colors of FT and started knitting samples for him to choose from. Father likes navy blue as I remembered. Together with Midnight, I decided on Treacle as the secondary main color. For the accent I chose dark red, mustard, and orange and let him select one. The color sequence was adjusted slightly so that the accent color is between dark brown Treacle, instead of Midnight. The sample I made is shown below in the order from the left. In case he misunderstand that the purl side is the wrong side, I sewed the samples on a piece of paper, and mailed them off to Japan.


According to my sister who watched my father made the decision, the orange one was out immediately. He was unsure between the remaining two, but the notion that ‘red’ is for young people got the better of him and he decided on mustard yellow. Personally, I would have enjoyed knitting orange version best.

Knitting this cardigan went rather smoothly. First the back and then I moved onto sleeves. Once they were finished, I assembled pieces and tried it on my DH to determine the location of the V-neck. Remembering that Father has a bit of belly, I added two to three inches extra to the front.


One detail shot of front bands.


I use back buttons on knitted cardigans in order to prevent over stretching of the fabric under buttons. Also, note the locations of buttons relative to holes. Do you notice that they are not right in the middle of the hole? They are almost at the top of the holes. When placed in the middle, the left front tends to hang lower than the right as the left front slides down until it is supported by buttons. In a sewing book, you learn how buttons and button holes are positioned relative to each other, and that’s how I know.