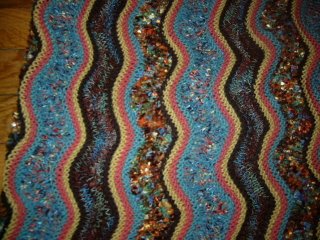
Saturday, June 13, 2015

Semi-formal Dress

I meant to post this long time ago hoping that we will have a better photograph.  Never happened so far.  So, here it is.

DD2 requested a semi-formal outfit consisting of a black dress with plunging back and halter neck and a chiffon coverup.  We decided to start with the dress.  Luckily, I had Vogue pattern 2772 in my pattern stash.  It is a floor length fitted dress with plunging back and pleated front bodice by Donna Karan.  The only thing I needed to change was: shorten the skirt considerably and remove the pleats in the front.  Simple enough...


The small pattern piece looks like a piece of trash because it got mixed up with scrap and got crumpled up.  Luckily, I saved it before too late.  


I was able to combine lower skirt pieces with corresponding upper body pieces which resulted in three pattern pieces only.  In order to remove the right front pleats which becomes the halter neck when extended beyond the shoulder, I used the unpleated left front and tilted it towards center front line in order to remove the excess fabric incorporated in pleating.  Lucky for me, my modification worked well on my daughter.  Really some luck.  

In order to keep the upper bodice in place, we decided to use wide black chiffon ribbons attached to the upper edge of the front bodice.  They add a drama to the outfit.  

For the coverup, we used Vogue 7742 View E, shortened so that it is just a little bit longer than the dress, and the front edges were modified to a smooth line from the top of the neckline to the center waist.  

DD2 was happy with the results, except for ...

The snowy weather on the day of the event.  All the girls were shivering in dresses.  


While, parents were in winter coats ...

She and her girl friends, several of them, had a great time I hear.  They went as a group of girls without male escorts.  They thought they do not need boys to have fun.  
  

Monday, February 16, 2015

Bright Colors

As soon as I saw Fall issue of Vogue Knitting magazine last year, my mind was set to knit Ms. Wallin’s brightly colored pullover.  Yes, yet another project with the design by Ms. Marie Wallin!  


I was knitting Avril Silk Tsumugi tunic at that time.  Since I decided some years ago that I was not going to have two major projects at the same time any longer, I decided to wait until I have time to tackle the pullover.  I was tempted to start such a beautifully colored pullover, but I persevered.  Though I began planning the project immediately.  It was obvious to me to knit it in round.  Also, to add some waist shaping to it.  Other than that, I followed the pattern when I began knitting it in January.

Here are some close-up of the gorgeous colors and stitches.  Notice something?  The Fair Isle pattern in this pullover involves both knit and purl stitches in about 80 percent of rows.  It reminds me of Bohus knits.  I just love those purl bump mingling of colors adding extra dimension to the fabric.


I must add that the yarns are fabulous, Rowan Kid Classic and Rowan Alpaca Colour. I used the specified colors, but there are a few versions knitted using different colors on on Ravelry and they are gorgeous as well.  This was the first time I used Rowan Alpaca Colour and I find it very soft and warm.  I was glad that the sleeves were not in Fair Isle pattern.  I have been wearing the pullover with such joy.  Perfect for this long snowy winter.


So, what's next?  Well, I will be honest, another design by Ms. Marie Wallin!  

Sunday, February 15, 2015

Bulky Quick Knits

After the long project was finally completed, I needed quick projects.  So, naturally, I chose to knit garments with bulky yarns.  One was a vest which I knitted once already.  I love it so much that I wear it constantly.  So, another one was in order.  This time, the yarn I chose was less substantial and more airy.  As a result, the vest turned out to feel a bit different.  Nevertheless, I love it.  The only problem was that the front neck line was too low.  It was fixed by use of a pin.


Next, another bulky project using the same airy yarn as the vest.  It was a pullover by Norah Gaughan, Maison Delaunay.  The garment shape is quite unusual for me, a sort of trapezoid.  My friends at KnitSmith loved it.


Saturday, February 07, 2015

Long Project

It is snowing again here.  It is time to write up some posts on past projects since last summer.

I was too busy at work towards the end of 2014 to do much knitting.  All I could do was trying to finish Silke No. 2 that I started in August while we were in Japan.  It took many months to complete.  This is the second version of the garment.  The first one was finished almost two years ago. Since it turned out to be too small for me, I gave it to my DD2.  I could not just give it to her and forget the project, however.  I love the fabric knitted with Tsumugi Silk and the design is very attractive.  Determined to knit a second one for me, I took measurements of the garment, compared with the finished dimensions, and decided that I was better off knitting size XL given my gauge.

So, here it is.  The second one was a bit too large initially, but washing in warm water took care of it and I can say it fits me very well.  It is a cardigan for spring or fall.

At least, I feel satisfied with the result and I can put the pattern to rest.  I must say, Tsumugi Silk produces such a beautiful fabric.  A spring pullover would be nice with it.


Monday, October 13, 2014

Hats for Veterans and Kids 2014


This year, we were asked to knit for Veterans and for "Caps for Kids."  Here are my contributions.

First for "Caps for Kids" which is organized by Dana-Farber Cancer Institute.  

Tiny baby bonnet knitted with cotton angora yarn.  This is such a cute little thing and I love how it turned out.  I think this pattern will be knitted many times over.  Its pattern is available free from here on Ravelry.  I knitted the ties and front edge band all together by using provisional cast on method.


Baby cap in wool yarn and child's cap in the same cotton angora yarn in a different color.  The pattern is also available free from here on Ravelry.  For the cotton angora version, I did not follow the pattern for the decreasing section and started the decreases by repeating k7, k2tog 8 times.  


And, my hats for Veterans.  The purple hat looks small but it is very stretchy.  Definitely large enough for adults and the pattern is Utopia Hat by Smariek Knits knitted with Karabella Yarns' Aurora 8.  The brown hat is knitted with wool-silk blend yarn and the pattern is Graham by Jennifer Adams.  These two hat patterns are available free.  The last one is a beret knitted with lovely Mountain Colors Mountain Goat yarn in Northern Lights and the pattern is Gretel by Ysolda, purchased.


I definitely enjoyed knitting all of these hats.  My DD2 loves Graham and I was asked to knit one for her.  We have yarns already.  Back to my regular knitting projects now.  

Wednesday, August 06, 2014

New Project

This cone of Silk Tsumugi yarn was waiting for me at my parents' home.  

Saturday, July 26, 2014

Warm Weather Knitting

This summer, I began with knitting a wool/linen three-quarter sleeve pullover. This was a success: love the yarn and the pattern.


Yarn: Leinen Los (70% wool and 30% linen blend) by Schoppel-Wolle 
Pattern: Gemini by Jane Richmond, from Kintty
Needles: 4 mm

I partially followed modification applied by the designer herself on her later version to transform the tee to three-quarter length sleeves. Also, I decided to use lace pattern throughout along the neck. 

To do lace pattern all around the neck turned out to be rather simple. First race round: yo twice, k2tog, k2tog, yo twice, k2tog … The first yo is for the last yo of the round. You will see when you try it yourself.  On the next round: One has to move the marker for the beginning of round every round and move the marker one stitch ahead so that the first yo will go to the end of the round. 

Following the notes from the author’s modified version with ¾ length fitted sleeves, I stopped increasing stitches once there are 66 stitches (for size M) for sleeves, while I kept increasing stitches per instruction for front and back bodice. The author recommends the following stitch count for fitted sleeves: 56 (60, 66, 74, 80, 88, 94) stitches. 

Sleeve shaping for 3/4 length sleeve knitted flat: Increase stitches at the beginning and the end of the 66 stitches for seam allowances. Knit even for 12 rows. Worked paired decreases on the next and every 10th row to 48 sts. Knit one more row. Switch to 3.75 mm needles and knit in 1 x 1 ribbing for 6 rows. Total of 100 rows were knitted for sleeves. Cast off loosely. 

Applied slipped chain stitches along the inner cast on edge along the neckline to reduce the neck opening.


It is too warm to wear the pullover outdoor now, but it is useful indoor where AC blasts.


Next, a cotton/silk peplum cardigan.  I used long-since-discontinued Fable yarn in red/orange color, named Goldilocks and the three bears.  I even had perfect buttons for the yarn.


Yarn: Fable (85% cotton and 15% silk blend) by Artful Yarns 
Pattern: Searing by Kim Harvreaves 
Needles: 4 mm and 5 mm

The design is for worsted weight yarn with 20 stitches per 10 cm while my yarns's gauge is 16 stitches with 5 mm needles.  I knitted the dimension of size M by following stitch counts for size XS and adjusted the row counts as I went on.  I did not have enough yarn to knit the full sleeve length and I knitted sleeves somewhat shorter.  The cardigan is intended for summer and I am fine with shorter sleeves.

And, next up will be Estonia dress!  I am all excited about this project.

Sunday, July 06, 2014

Baileys Irish Cream Cardigan

Before I got busy with glove knitting, I finished Baileys Irish Cream cardigan.  The lace pattern on it is very pretty, and every detail appealed to me.  Naturally, I fell in love with it as soon as I saw it. 

Mine was knitted with a sport weight yarn with 20% cashmere, slightly thinner than the pattern calls for.  Hence, I followed instructions for a larger size. 


Skirt: Christine Jonson’s Pencil skirt
Tank Top: New Look 6068 View B

Thursday, July 03, 2014

Ms. Marie Wallin

Sometimes I do not pay much attention to the designers of my knitting projects, especially when they are from magazines.  Last winter, though, I noticed that I was knitting two of the designs by Marie Wallin.   Over all, I've knitted five of her designs: namely BronwenGelsey, Harris, Curio, Orkney and Harmonie.  Not only that, four of my to-do projects are by Ms. Wallin.  If you are on Ravelry, you will see which one I am talking about: Kintyre pullover, Rannoch dress, Glade pullover, and Dietrich cardigan.  Obviously, I love Ms. Wallin's work.  I wish her well in her health and her creative career.

Friday, June 13, 2014

Gold Jacket for Prom


For her prom, my daughter chose a pair of wide-legged and loose pants in sheer material which comes with built-in shorts, a tank top, and a heavy gold chain necklace.  The necklace has been in the dress-up costume drawer since my daughters were in kindergarten.  I thought she may need a cover-up of sort in case the weather turn cooler.  So, we went to our local Jo Ann to look for fabrics.  She chose a gold laminated cotton blend, the loudest gold fabric we could find at the store.  Her choice of pattern was Butterick 6029.  


We made several changes: Increased the collar height by 1 cm, Used the top layer of the jacket only, and re-shaped the front decorative piece.  The fabric was difficult to deal with since stitches could not be removed without damaging the fabric and the ironing had to be done very carefully.  Still, we are both happy with the result.  To be honest, I was not so sure about her pattern selection initially.  Being Mom, I decided to go along with the daughter's wish and intuition.  I am glad it all worked out nicely.  She's got an eye for style and fabric.  

Wednesday, June 11, 2014

Herringbone Gloves

Done!


Compared with Sanquhar gloves, they fit better due to its smaller hand circumference and better shaped thumb gusset.  Still, I love the geometric pattern of the Sanquhar gloves.


My next pair of gloves will be a variation of the herringbone gloves: same construction in hound's tooth pattern.  There are several versions on Ravelry knitted in hound's tooth pattern.  I already have yarns for the pair.

Sunday, June 01, 2014

Herringbone Gloves Update

One more finger to complete for the right glove.


Monday, May 26, 2014

New Project and New Bag

I was not planning to start another pair of gloves so soon, but I got excited about the pattern and I cast on almost immediately.


See my new project bag?  It is made by Alexis, a fellow Knitsmith.  It is just perfect for my new addiction which is Glove Knitting.


I am using the leftover Legacy Lace from Duke Design Sanquar gloves.  Since I have less in Pinot Noir, I reversed the color scheme.  The original pattern is written for fingering weight while mine is a lace weight.  I am revising the pattern to accommodate the gauge difference as I go along.  So far, I've used 0000 and 000 needles.  


Saturday, May 24, 2014

Finished Gloves

My first gloves are completed.


As I inspect each glove, it is clear the first one, the left glove, suffered multiple unknitting and knitting as well as unevenness of tension.  In comparison, the right glove went much smoother.

The right glove on my hand.


I am encouraged with the experience and planning to knit more gloves.  The next one in my list is Herringbone Gloves.

Saturday, May 17, 2014

Taming Uneven Stitches in Round

As reported in the last post, it was my fourth start that was successful and it went well until I began knitting fingers.  Those small tiny circumferences are tricky.  I ended up knitting too tight or too loose, requiring unknitting and knitting here and there.  I may have knitted 10 fingers or more to get them right.  I need to check my knitting regularly it seems.  

I also noticed, depending on the thickness of the yarns which is not consistent, my stitch size varied.  What can I say.  I would love to find a wool/silk blend lace weight yarns for the next pair of gloves.  Any suggestions?  


With Lisa’s advice, I decided to place the little finger a bit lower than the other three fingers.  I slipped stitches for the little finger onto safety pin 7 rounds before starting the other fingers (on the fifth round of the fifth pattern repeat): Knit 11 stitches and transfer them to a safety pin, continue knitting 68 stitches, and transfer the remaining 9 stitches to a safety pin.  To complete the round, cast on 9 stitches for a gusset and join.

The rest of the glove was knitted per instruction, except the number of rows in checkerboard pattern at the tip of the middle finger: I knit 1 row only instead of 3.

Notes:
  1. At the start of each finger, two dark colored stitches are picked up at the beginning of the round.  Pick them up and knit by inserting a needle into stitches.  When inserted between stitches, a hole was visible.
  2. Hold the right needles below the needle with stitches just finished.  It is easier to control tension when held in this manner.
  3. On last two rows at finger tips:

    • Distribute stitches so that all three needles have the same stitch count and the stitch pattern:  BWBWBWBWBWB. 
    • Next round: ssk in B, ssk in W, k2tog in B, W, ssk in B, k2tog in B: Choose ssk and k2tog so that the stitch on top has different color from the stitch to be knitted.  
    • Last round: ssk in B, ssk in W, k2tog in B. 


Saturday, May 10, 2014

Sanquhar Gloves by SWRI Dumfries Museum


This is what I am knitting.  Its geometric pattern is so pretty.  

My pattern came from Scottish Women's Rural Institute some years ago.  They have four variations available: Midge & Fly, Duke (the one I am going to knit), Shepherds Plaids, and Prince of Wales.  The pattern can be purchased at SWRI (here).  If you are interested in more information you could read on at Dumfries Museum.


After swatching and getting used to 1.5 mm needles, I began casting on for the left glove.   It was not a smooth sailing.   After the fourth trial in knitting the actual glove, I finally got the satisfactory result!  As they say, practice makes it perfect.  

Here is what I did which is a bit different form the last post and I used stockinet stitches only on lighter color.  I cast on 81 stitches in 1-by-1 ribbed cable cast-on method.  The first stitch was purled in the rib pattern.  Do not join.  Knit the next solid color row flat in the rib pattern until one stitch remain.  Join by purling the last and the first stitch together.   The ends of the first row will be sewn together later.


  • R1: Knit in the rib pattern in dark color. 
  • R2: Start Fair Isle.  Rib in dark color while stockinet in lighter color. 
  • R3-5: As in R2. 
  • R6: Knit all the stitches in stockinet this round onward.


The cast-on edge is slightly curled, but it does not have the thickness observed on the second swatch.  So, I am happy with it.  

Wednesday, May 07, 2014

Taming Curled Cast-On Edge

I did another swatch ...

As you can see, the first one on the right is curled up at the cast on edge when not pinned down.  My second swatch (on the left) is not! 


I used a cast on method with one-by-one cable pattern described here.  The rest of the instruction is written as if to knit in round while the swatch was knit flat.
  • Knit the first round in solid dark color in the rib pattern. 
  • Knit the next Fair Isle round in the rib pattern using Elizabeth’s purl-when-you-can method (the stitches in lighter color in stockinet).
  • Knit the next two Fair Isle rounds in the rib pattern.
  • On the next round, knit stitches in lighter color in stockinet and those in darker color in the rib pattern. 
  • On the next round onward, knit all the stitches in stockinet.
The second one is better than the first in terms of curling, but it is a bit uneven and actually look a bit thicker at the bottom.  It is because of the ribbing on Fair Isle rows.  When I used the rib pattern over a few rounds only, the edge was still curling.  Thus, I continued in the rib pattern for four rounds. 

I am ready to cast on for real!